
Modern Wrapped Tree Ornaments
Disclaimer: Please note that some of the links below are affiliate links and at no cost to you I will earn a commission if you purchase through those links. See my Disclosure + Privacy Policy for more info. As an Amazon Associate, I earn from qualifying purchases.

Welcome to the second week of the 2015 Ornament Exchange! I am partnering with 80+ bloggers to exchange ornaments and we want to share our creations or special finds with you!
From November 1- 14th our group of ladies will be sharing our ornament tutorials or shopping trips to provide you with lots of holiday inspiration.

I saw these Scandinavian inspired holiday tree ornaments on Pinterest and fell in love with the simplicity of them. I am all about modern European decor this year. I love the clean, simple look of their holiday decorations. Cute simple trees, garlands, and ornaments. The ones I found on Pinterest were a craft made by a designer for Remodelista you can check them out by following the link.
I wanted to make something geometric and these looked like a pretty simple DIY to recreate, so I thought I would give it a try. For added flair, I made mine with gold metallic floss and wow did they came out gorgeous! I am giving these as a gift to my partner in the 2015 Ornament Exchange!
I used my Silhouette Cameo to cut out the triangles, but do not be discouraged if you do not own a die cutting machine, you can use plain old scissors to cut them out because I provided a printable guide so you can cut the triangles out perfectly. I also used Silhouette Chipboard for the base. They can definitely be made with any type of thin cardboard, much like a cereal or snack box. Here’s how I made mine~
Modern Wrapped Tree Ornaments
Supplies:
- Silhouette CAMEO
- Silhouette Chipboard
- Embroidery floss: white, light green, dark green, gold metallic
- Acrylic Paint, white
- Hot glue & gun
- Silhouette Chipboard
- Scott Photo Splits, double sided adhesive squares
- Triangle Ornament PDF Cutting Guide ~Click to download
Instructions:

- Click to print out your Triangle Guide, link is in supply list above. Cut out triangles and use as a guide to cut them out of cardboard.
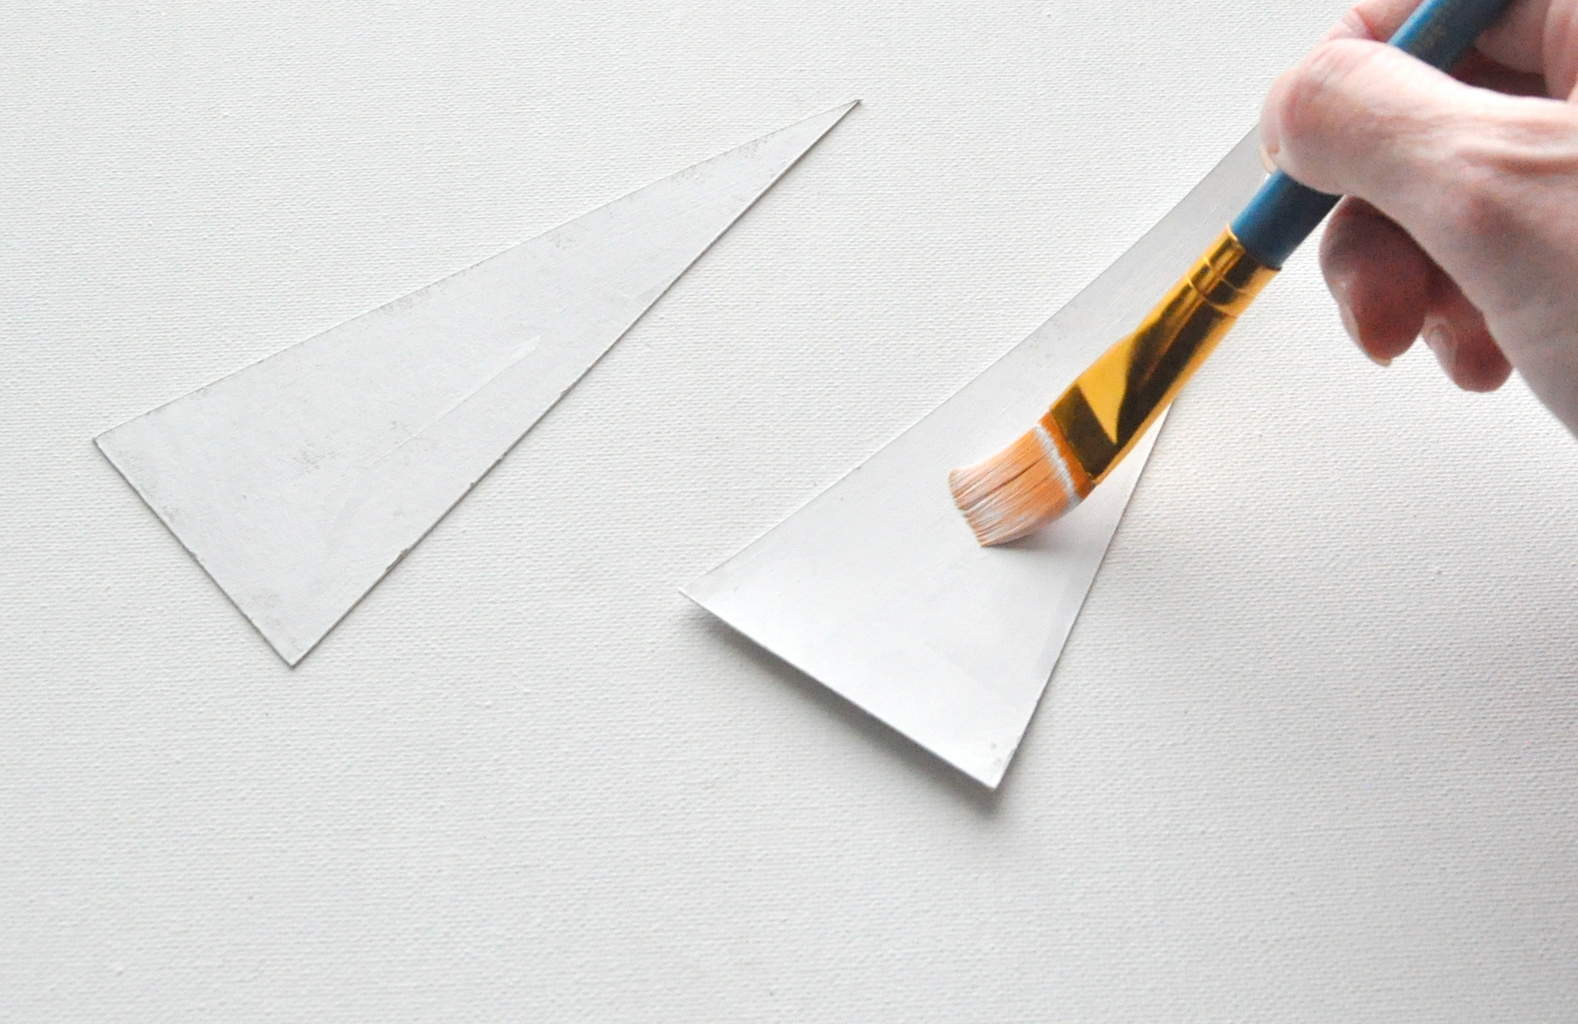
Paint your triangles with a light coat of white acrylic paint. Let them dry.

Add a line of Elmer’s adhesive to the bottom of the triangle. Press the end of the string on the adhesive and slowly and evenly start wrapping the floss around the triangle.

Add the Scott Photo splits up the sides of the triangle as you wrap, this helps the floss to stay secure and not move.

You are going to wrap two layers of floss. After the first layer, on the back of the ornament only, roll Elmer’s Adhesive on top of the string. This is so second layer will not move while you are wrapping it. Hot glue the ends of the floss down at the end. Start the second color and repeat steps.
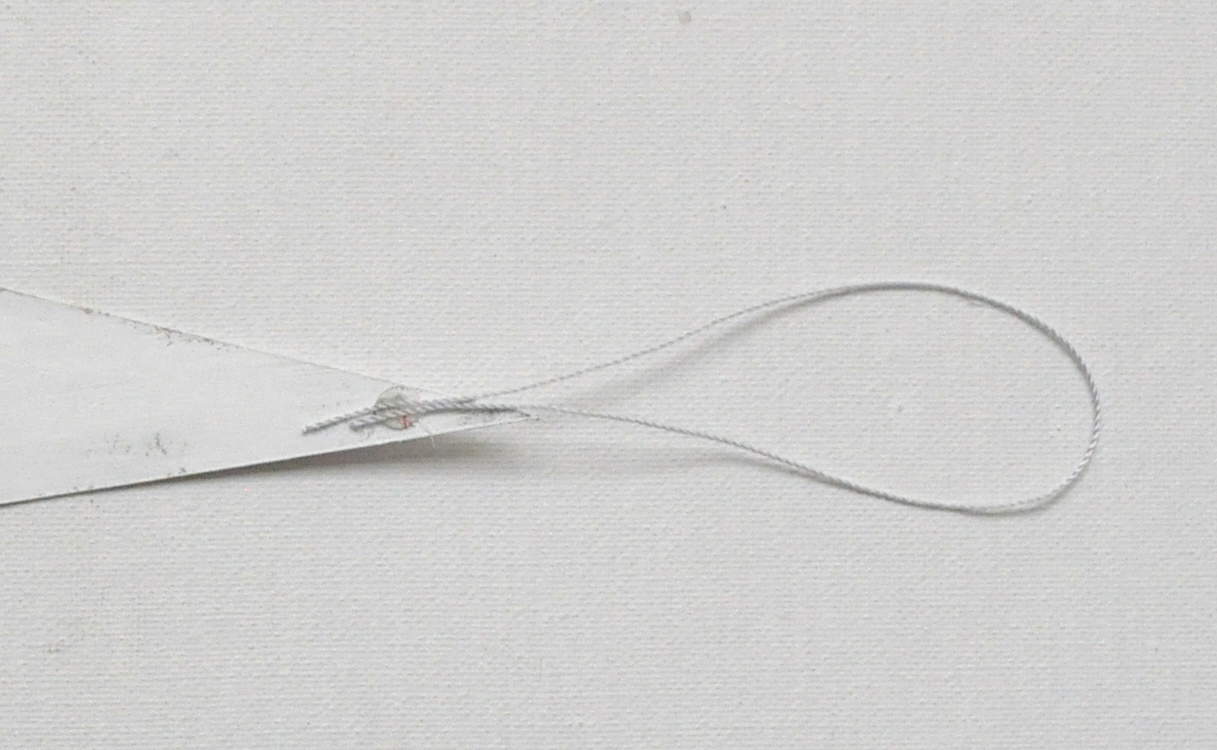
Before wrapping the top of the triangle hot glue a piece of floss to the tip for the hanger. Continue wrapping. Hot glue the end of the floss. And that’s it!
It does take a little practice keeping the floss smooth and even. Just wrap slowly and evenly. I love these! I’m thinking, a bunch of these would make a super cute garland for the fireplace and/or tree too!
LOVE IT? PIN IT!

If you missed the first week of projects you can see them on the 2015 Ornament Exchange Main Link Page on My Pinterventures!
I am excited to be hosting Today’s Ornament Exchange Group with these six other ladies~

- Love my Messy Messy Mess | Favorite Things Decoupage Ornament
- Lexi Michelle Blog | DIY Paper Pine Cone Ornament
- An Oregon Cottage | DIY Scrabble Tile Grapevine Wreath Ornament
- Home on the Corner | Paper Pine Cone Christmas Ornament
- B is 4 | DIY Christmas Woodland Ornament
- Where the Smiles Have Been | Clay Vacation Ornament
Check out more of my Holiday Projects~
Bottle Brush Embroidery Hoop Ornament


These are super cute, and I love how simple they look — pinned and tweeted!
Love these ornaments! They are so modern and whimsical. I bet my kids would have fun making some like this if I used yarn or something a little bigger than the embroidery floss.
Kim they are so darn cute! At first I thought they were 3D, they look amazing! And so easy to make too. what a fantastic idea! I also love the colours you chose!!!
Glad you liked them Katrin! They are so pretty I may need to make more for me, they were hard to give away, Happy Holidays!
Kim
Seriously, you make the simplest things looks so elegant. Love this! Thank you so much for supporting the 2015 #ornamentexchange.
How sweet are you! Thanks Erlene it was awesome!
Kim
These are just lovely – so classy and modern.
Hello I am a fellow ornament exchange participant popping by. Your ornament is so clever and cute!
Have a wonderful day.
Thanks so much Laura! I may need to make some more for myself! lol!
Kim
I love these.. it is hard to find modern style ornaments and these nail it! Thanks for linking up to You’re Gonna Love It.
I really like all your Christmas crafts in this post but the modern simplicity of those tree is over the top fantastic design!
Thank you Janet!
Oh these are so pretty! Love all of your gorgeous projects :)
Thank you Maria!!
Wow, I really like these!! Hoping I can recreate them with just hand-cut triangles. :)
Hi Kim, so excited for our day 10 ornaments to be revealed! I love how unique and creative all of our ornaments turned out to be – I LOVE the modern look of yours. So chic and simple – great job! Pinning and sharing!
Kim ~ These are SO cute! I love the different colors and the modern tree shape. Awesome job!
too cool! i thought they were totally 3-d! I love these and man getting some ideas!!
What a great combination, your Silhouette Cameo and string. Definitely two of my favorite things. What a simply elegant ornament!
I really like how these turned out! Simple but stunning! I love the cute little gnome I spied on the way down to comment. So cute!
Kim,
These are so adorable! I just love them! Pinning and making some for myself soon :)
Thank you for sharing with us at Brag About It!
~Laurie
Thanks for stopping by and sharing! Hugs!
Kim
I was the lucky recipient of these trees! They are even more beautiful in person!!
Thank you Amy! So glad they made it ok! Have a great Holiday!
Kim
Really cute idea – unique, fresh, modern!
Thanks Marie!
I love these ornaments! I’m very much into the clean simple look as well!
Those are so pretty! and they look easy to make, perfect for me ;0)
Thank you!