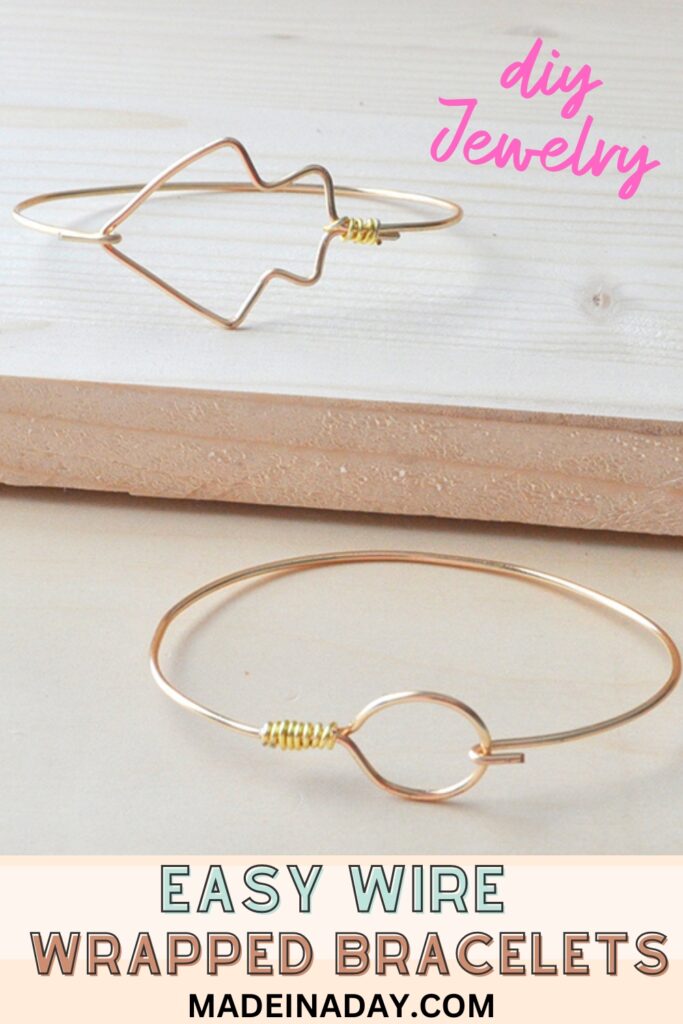
DIY Wire Wrapped Bangles

Learn to make your own jewelry! Simple wire wrapped bangles bracelets from jewelry wire with this easy wrapping technique using jewelry pliers. Perfect to make as a gift! For more DIY fashion see my Jewelry page.
This summer we took a quick trip to beautiful Asheville, NC. My son goes to college there and we go a couple of times a year. We love the beer breweries and vibe of this quirky mountain town.
Disclaimer: Please note that some of the links below are affiliate links and at no cost to you I will earn a commission if you purchase through those links. See my Disclosure + Privacy Policy for more info. As an Amazon Associate, I earn from qualifying purchases.
⚡️NOTICE: Submitting forms for FREEBIES on this site too quickly can trigger our email spam filters. If you stop receiving your Freebie Delivery Emails, please try using a different email address, an incognito window, or you can Contact us to whitelist your email so you can receive them.

On this trip, we did the Biltmore Estate Tour. It is such an amazing home. It is huge, it’s hard to believe the family lived there up until the late 1950s. It was then turned into an attraction. The home is North Carolina’s most-visited tourist attraction and the largest privately owned home in the nation. If you are ever in the Asheville area this mansion is the one to see!
After touring the sprawling home and garden, we ate ice cream from the Biltmore dairy and meandered through the fun gift shops. The shops are full of the victorian era goodies, including jewelry, clothing, hats, and toys.
That’s where I spotted some cute wire wrapped bangles. It was love a first site. I knew I had to make some!
These bangles are super easy to make. The original ones I saw that day were silver with gold wrap accents. I used a pretty light copper wire that actually looks like light gold. I used a more yellow tone gold wire as the accent. Let’s go make some bracelets!
DIY Wire Wrapped Bangles
Supplies:
- 16 gauge copper jewelry wire
- 20 gauge gold jewelry wire
- Jewelry Pliers, wire cutter, flat nose pliers
- Small wood dowel rod for shaping

NOTE: If I were making this again I would use a heavier gauge wire for the base. I found the 16 gauge would become misshapen after wearing a few times.
Instructions:
Cut a 8-9 inch piece of 16 gauge wire. Do not stretch the wire out straight. Try to keep the oval look of the bangle in tact. The less bends in the wire you make the better the bracelets will look.

Bend one end at a sharp angle.

Wrap the area behind the end around a small wood dowel to get a perfect circle shape.

Bring the end around to the base and wrap tightly with a 1.5 inch piece of 20 gauge gold wire.
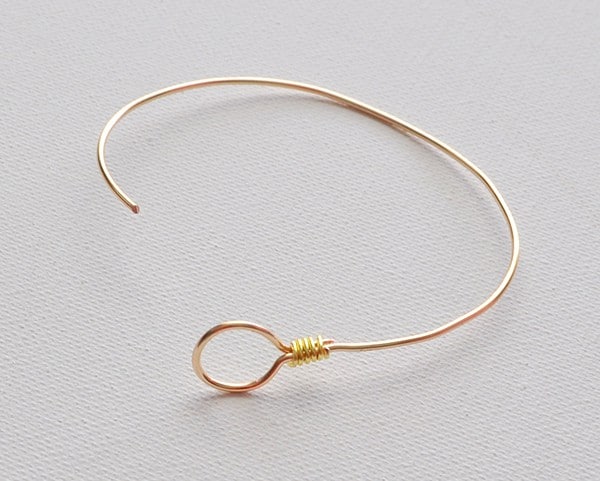
Trim the end and tuck it under.

Smooth and curve the bangle to fit around your wrist. Bend a 1/4 inch of wire outwards and down on the open end. Clip the end through the circle and that’s it!
I love the dainty look of the thin copper. I made a few of these and stack them with my Stone Beaded Bracelets. These cute bracelets would make great gifts too!
AMAZON FAVS


Love it? Pin it!

Hi Kim! I just want to let you know that I have chosen your cute bracelets for my feature tomorrow at Totally Terrific Tuesday. Have a great week!
How fun and cute! Thank you for sharing. You are one of the fan favorites at the Sunday Showcase from the Make it Pretty Monday party at The Dedicated House. Have a happy week! Toodles, Kathryn @TheDedicatedHouse
So much to see and do, great and doable projects that are affordable, now that’s my idea of great projects. So glad you shared these. Think 16 yr. old grand daughter might like these. Out of all grand kids, she’s the only crafty inclined one. Your jewelry all looks really great to wear for many occasions, love ones using wood shapes.
Happy daze