Gilded Rose Quartz Decorative Box Makeover


It’s time for a new Thrift Store Challenge!! This time I am making over a decorative box I bought years ago while thrifting. I have had it in my living room as a base to give height to other decor pieces. When you see the before pic you’ll see why. It had an old cherub pic decoupaged on the top of it. It just didn’t mix with my decor so I hid it.
After a little sanding to remove the image and glue from the top of the box, I added a new coat of gold paint. Crystals are everywhere this year and since I needed a little pink in my family room to go with my Mounted Tapestry, I used some rose quartz to add an interesting new look to this $1.99 thrift store box. Here’s how I transformed it!
Gold Rose Quartz Decorative Box Makeover
Disclaimer: Please note that some of the links below are affiliate links and at no cost to you I will earn a commission if you purchase through those links. See my Disclosure + Privacy Policy for more info. As an Amazon Associate, I earn from qualifying purchases.
⚡️NOTICE: Submitting forms for FREEBIES on this site too quickly can trigger our email spam filters. If you stop receiving your Freebie Delivery Emails, please try using a different email address, an incognito window, or you can Contact us to whitelist your email so you can receive them.
Supplies:
- Old Box
- Spray Paint: Gold
- Rose Quarts Crystals
- Hot Glue & Gun
- Gold Gilding Sheets
- Gilding Glue
Small Cardboard Jewelry Box (Optional) see below.

Instructions:
Clean and lightly sand any imperfections on the box.

Paint the box with gold spray paint.

Note: I only had a small amount of rose quart pieces and I wanted to add some height to the top of the box so I glued a small cardboard jewelry box lid to the center of the box. If you have enough quartz to stack, skip this step.
Rinse and dry the quartz stone pieces with a towel. This will remove any dust they get by rubbing together in shipping and it really makes them shine.
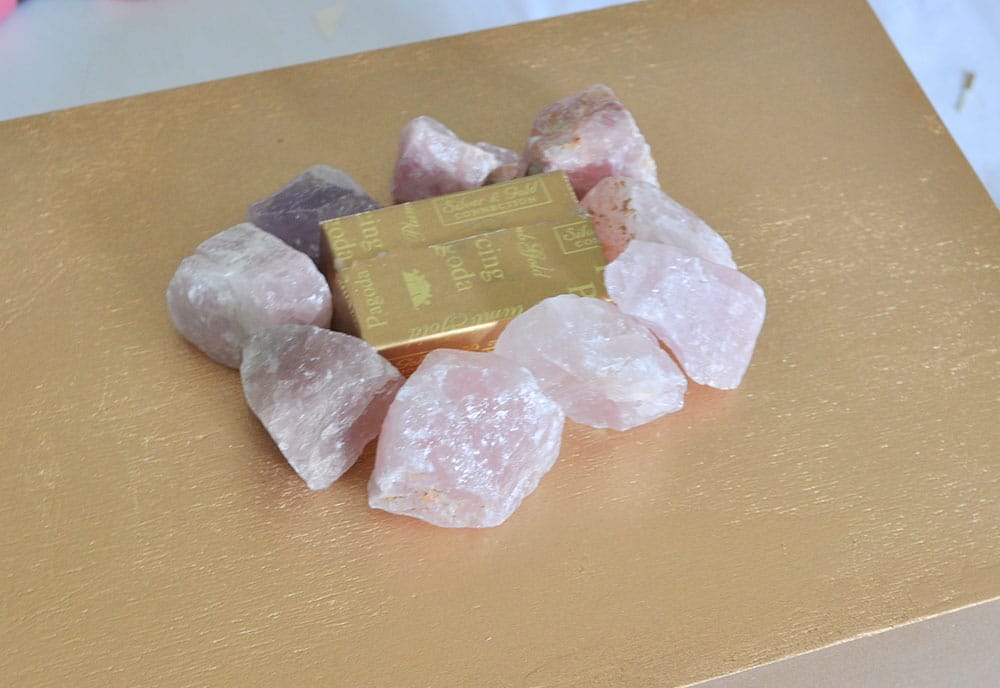
Place the quartz pieces around and on top of the cardboard jewelry box lid (if using). Arrange and move them into place until they fit perfectly together.

Remove each piece one by one and glue down with hot glue.
Note: I decided to try the hot glue first to see how well it would stick to the rose quartz. I used large glue dots to anchor them to the wood box and they did just fine. If you find you can not get the quartz to adhere to your box you may need a glue like E6000 Craft Adhesive to give it a stronger bond.
Next I added Gilding glue to the edge of the quarts. Let it dry a few minutes until the glue is tacky. Add small pieces of gold gilding sheets to the areas you put the adhesive. Let them dry. Use a dry stiff paint brush to knock off any leftover gilding foil paper that is loose on the quartz. For more detailed instructions on how to use gilding see my Gilded Earrings post.

Let everything dry and display your new glamorous Golden Rose Quartz home decor!

LOVE IT? PIN IT!!


I love rose quartz and pink and gold just rock (pun intended) together! Very pretty!
Very cute idea! I love the gold painted on the rocks. So cute.
Kim, this is so gorgeous! I really love the added gold gilding detail you added to the rose quartz! So pretty!
Gold + Pink = Perfection! Great job! xo Kathleen|Our Hopeful Home
This box fits in perfectly with your boho vibe. The gold edges are the perfect finishing touch.
I’m in love with how you did the crystal edges in gold. So elegant.
This is a beautiful makeover. Little wooden boxes are so versatile. The box is elegant.
Beautiful makeover! I haven’t used gilding yet but I would love to try it now!
Wow, so pretty! Looks like something from a pricey designer store. Very chic! Visiting from Thrift Store Challenge.
Very glamorous indeed! I love the look of pink and gold together and using the rose quartz was brilliant.
I have seen those boxes at the thrift store so many times. I like your gold vignette. Love that pink quartz!
Awesome job! The gold pops so beautifully of the rose quartz :)
I can’t believe you didn’t like that Cherub picture on top ;) LOVE LOVE LOVE the makeover you gave it. Gold and pink quartz you just can’t go wrong!