Bottle Brush Tree Embroidery Hoop Ornament

Elevate your holiday decor with our stunning Bottle Brush Embroidery Hoop Ornament. Handmade and full of festive charm, it’s sure to become a cherished keepsake. See more of my Christmas ornaments on my Christmas Hub page.

Adding a personalized touch to your holiday decor has never been easier than creating an embroidery hoop bottle brush ornament!
Browsing around at my local craft store and I found some crazy cute tiny holiday craft sisal bottle brush trees and 3-inch embroidery hoops. I just couldn’t resist making something special out of them.
Disclaimer: Please note that some of the links below are affiliate links and at no cost to you I will earn a commission if you purchase through those links. See my Disclosure + Privacy Policy for more info. As an Amazon Associate, I earn from qualifying purchases.
⚡️NOTICE: Submitting forms for FREEBIES on this site too quickly can trigger our email spam filters. If you stop receiving your Freebie Delivery Emails, please try using a different email address, an incognito window, or you can Contact us to whitelist your email so you can receive them.
Embroidery hoops are an essential tool for any embroidery artist, but they can be used in so many more creative ways! I have a Woodland Holiday Wreath made from extra-large embroidery hoops.
The hoops by themselves can act as frames, usually showcasing a hand-stitched masterpiece, or like this tutorial, you can make a sweet scene using mini bottle brush trees!
The possibilities for designing embroidery hoop ornaments are endless. You can experiment with different colored bottle brush trees or animals like miniature reindeer or other holiday characters. Most craft stores have a miniature section for creating holiday villages. You can find some really cute small items to make ornaments with on those aisles.
Another idea to make these embroidery hoop ornaments is to use scraps of fabric from clothing items such as baby clothes or wedding gowns, adding a sentimental value to each ornament you create.
I loved this one so much, I ended up making another one of these sweet embroidery hoop ornaments to keep for myself! Here’s how to make one for yourself this season!
Bottle Brush Embroidery Hoop Ornament
Supplies:
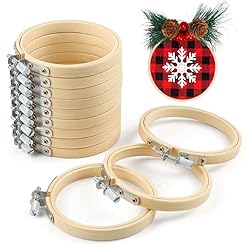
- Embroidery Hoops, 4-Inch
- Bottle Brush Tree
- A sheet of beige felt
- Ribbon
- Pliers
- Hot glue and gun

Instructions:
- Unscrew to loosen the embroidery hoop and remove the inside hoop. This is the hoop you will be working with first.

- Find a tree in your set that fits perfectly inside the hoop. Mine was a little too tall, so I pulled the tree off the base and trimmed it with pliers.

- Hot glue the base only to the bottom of the hoop.

- Cut a rectangle of felt to cover the tree base completely and up the sides a bit.
- Hot glue one long side of the felt to the back of the tree base, neatly at the edge of the hoop. This will be the back side of the ornament.
- Wrap the felt over the tree base and over the other side of the hoop.
- Cut a small hole in the felt over the tree base so you can insert the tree back into its base.
- Place the outer hoop (the one with the tightening screw) over the other hoop and felt.
HOOP IDEAS


- Pull the felt tight and smooth, and tighten the screw so the hoops are snugly held together.
- Turn over to the backside of the ornament and trim the felt to the edge of the hoop with scissors.
- On the back of the ornament, fold and tuck the excess felt, then hot glue the edges of the felt to the hoop to resemble snow, as shown. Pushing tightly, place the tree back into its base. You can add a dot of glue if you wish.
- Fluff your tree, and add a cute ribbon to the top for hanging on your tree, and you are done!
I am so thrilled with how this turned out! I love this ornament. I hope my exchange partner does too.
MORE FUN IDEAS


FEATURED IN


Love it? Pin it!


Thanks so much for linking up with the Found & Foraged party last week!! I hope to see you back tonight!! xo, Laura
Your ornament is lovely. I love the monochromatic look.
This is so cute!! I especially love the ribbon you chose to go with it. :) I’m hosting a link party tonight that starts at 8 pm – it’s called Found & Foraged. I’d love to have you stop by and link up a few of your projects! xo, Laura
This is so clever! Love how simple yet beautiful it is!
That is just adorable! Can’t wait to make one for myself :)