DIY Holiday Gnomes Craft

Add a touch of Scandinavian charm to your holiday decor with our DIY holiday gnomes. Spread cheer and get creative this season with these festive decorations. For more holiday ideas, see my Christmas Hub page.

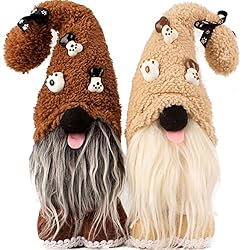
Step into a world of enchantment this holiday season with our DIY Holiday Gnomes Craft. These whimsical creatures have been a beloved part of Scandinavian folklore for centuries, believed to bring good luck and protect homes from evil spirits.
And now, you can bring their magic into your own home with just a few simple materials and some creativity. From their pointy hats adorned with frosted foliage to their fluffy beards made from faux fur, these gnomes are guaranteed to become cherished additions to your holiday decor collection.
Disclaimer: Please note that some of the links below are affiliate links and at no cost to you I will earn a commission if you purchase through those links. See my Disclosure + Privacy Policy for more info. As an Amazon Associate, I earn from qualifying purchases.
⚡️NOTICE: Submitting forms for FREEBIES on this site too quickly can trigger our email spam filters. If you stop receiving your Freebie Delivery Emails, please try using a different email address, an incognito window, or you can Contact us to whitelist your email so you can receive them.
Let’s embark on a craft adventure together as we learn how to make these delightful little companions that will add an extra sprinkle of joy and wonderment to your festive season!
This project is rated easy, so even if you’re a beginner, you can do it! Let me show you how to make them.
MORE GNOME IDEAS


I am the original designer of this Holiday Gnome craft. These are the full detailed instructions for the Noel Gnomes on Floracraft®’s website and listed on Joann Fabrics Website.
When I worked for Floracraft® as an Ambassador were asked to recreate one of their ideas into one of our own. I combined two of their craft projects this time around, the Holiday Gnome Wall Art and the Cone Christmas Characters, to make these sweet Holiday Gnomes.
How to make Holiday Gnomes
Supplies:
- Floracraft® Make It Fun® Foam Cones, (1) 9-inch cone, (2) 17-inch cones
- 1/4 yard each of three different Holiday Fabrics
- 1 yard of Grey Arctic Fleece
- 2 sheets (1/4 yard) of craft fur, white
- 1 sheet of felt, black
- Straight Pins
- 1-inch wood balls
- Craft wire
- Holiday Floral Greenery
- Rotary cutter and mat
- Razorblade
- Sharp Scissors
- Hot glue & gun
Instructions:

Roll the first cone over the fabric. Cut the fabric to fit the cone. Use hot glue on low heat. Place a line of glue on edge of the fabric and roll the cone over it to adhere.

Cut the fabric on the other side of the cone to match perfectly to the first edge and glue down. Overlapping by 1/8 inch. Trim the excess fabric from the bottom of the cone.
How to Make a Gnome Beard:

Turn the fur fabric over and use a razor blade to cut out a beard and mustache. Gently rub the razor blade over the fabric. Do not press down hard, or you will cut through the fur on the other side.

Use straight pins to place and adjust the beard on the front of the cone. Hot glue the beard down first. One inch below the top of the beard separate, part the hair and push it upwards.
Glue the mustache in the part of the beard fur. You want some hair to hang over the top of the mustache.
How to Make a Gnome Hat

Cut a 7 inch piece of craft wire and insert it into the top end of the cone.

Cut a piece of the fleece, I used the rough edge so I would have a cute roll on the brim of the hat. Measure the fleece hat brim to fit perfectly end to end around the cone, leaving the other end of the fleece long.
Mine are around 20 inches long and 6 inches wide. Each one will be a different length and width because all three gnomes are a different size.

After the edges of the hat are glued to the cone, twist and pull the hat lengthwise. Trim the fabric to a slight point around an inch past the end of the wire.
I found pulling and twisting the fabric made it fall into place for the hat. Start hot gluing the hat from the brim to the end. Stretching and twisting as you glue.
Make a Gnome Nose and Eyes
I used a paper hole punch to punch out two circles from black felt. Use straight pins to pin the eyes on. Add a wood ball for the nose with hot glue and some greenery on his hat and that’s it!
The dimensions of the other two gnomes:
- Using a 17-inch cone, trim off 6 inches, 3 from the top of the cone and 3 from the bottom.
- The last gnome is made with a 9-inch cone. Everything is made the same way just less fabric.


More Gnome Ideas:


Love it? Pin it!

FEATURED ON:


How do i subscribe to your site?? I LOVE IT!!
Hi Ann Marie, You can subscribe to my site on my right sidebar under my picture. Thanks for joining!
These are super cute and I want to make them. I’m curious.. because they are so tall with the hat, it seems they would be top heavy and the Styrofoam cone wouldn’t stand well, and keep toppling over. Do they fall over easily?
Hi Janice,
The base of the foam is wide enough and is a good base. The wire I used was aluminum and lightweight. So, no they are not top heavy at all and mine have not fallen over yet!
Kim
Having a hard time finding the fur for the beard. Where can I get it in Utah?
Hi Vicki,
You can buy it on Amazon there is a link in my supply list. Most fabric or craft stores carry it, I bought mine at Michaels Craft Store.
I hope this helps.
Kim
Love your gnomes. I’m going to make some tonight. Wish me luck
Made one of these and just love him!! I had a bit of a time with the hat but kept trimming until it was just right. My girlfriends are coming over Saturday and this is what we are making so I wanted to try one before they got here! Thanks for sharing it!
Hi Gina, Yes the hat can be a little tricky. Just pull and stretch until it get some shape. Glue small sections at a time. Or you could even make the hat somewhat smaller. Glad you like him.
Kim
Have made some other gnomes this year but will definitely be adding these too cute fellas to my holiday must do list. I’m 74 and have been crafting since I was 4 yrs old. Love your creativity.
That’s wonderful Kathy! Glad you found my blog and like my gnomes.
Kim
I made six sets of these fun gnomes this year. Then had friends over and we made some more. I used gray felt for the hats, hot glued as I rolled the felt and then trimmed it. They turned out great each time. I used black ball pins for the eyes. Make sure you use low heat glue! Thanks for the beard tutorial.
Oh I’m so glad you like them and had fun making them! They are too cute and yes black pins would be great!
Kim
These are just so stinkin’ cute! I love them! (Of course, I’m partial to gnomes anyway.) Thanks for always having fantastic craft ideas and sharing them with us!
I am totaly unable to do the hat….
It doesn’t fit and it doesn’t look the same as you did…
How you cut the fleece…in triangle ? If yes what kind of…
Need more explination
Hi Melodie,
Sorry to hear you are having trouble. No the hat is not cut in a triangle. It is rolled on the end of cone starting with the raw edge of the fleece. Hot glue one bottom edge of the hat onto the back of the gnomes’ head then roll and stretch the fabric into a point. Trim excess fleece off and hot glue the edges of the hat all the way up to the tip. There is no set size to the hat. The image in the tutorial is after I trimmed the excess fleece off.
Best,
Kim
Is 1 inch wooden balls the right size? That seems really big..trying to make them and get the stuff. How did you attach the nose? Also what kind of hole puncher for the eyes, they look tiny? One last thing what do you mean by straight pins?sorry these are really cute and my mother in law is obsessed with gnomes so I’m trying to make for xmas!
Hi Whittini,
Yes the noses are 1 inch wood balls. If you want smaller noses you could buy smaller ones. The gnomes are taller than they look in the pic, maybe that’s throwing you off. I glued the noses on with hot glue. I used a regular paper hole puncher for the eyes. The eyes are small if you want larger ones, you can make larger ones. Just cut them out of felt. Straight pins are normal sewing pins that are straight.
Kim
Thank you so much
the supply list has the fur listed twice, it’s just 2 sheets of fur, correct? Super cute!! thanks for sharing!
Hi Teresa,
Yes only two packages of fur sheets which is around 1/4 a yard of fur. I didn’t realize it was written twice. Thanks I fixed it.
Kim
Thanks for your speedy reply!!
I wanted to make some cone trees this year, so when I saw this I was delighted! Thank you for sharing this wonderful inspiration! I am a (very) new blogger and will be posting this on my site. :)
Hi Kim
Thank you for sharing your knowledge on cutting the fur for the holiday gnomes with a blade. I have just cut out thirty beards, very easy, very smart looking and much less mess from the fur. It is so nice to have people like you that share their knowledge. Truly appreciate your kindness. From South Africa.
Hi Gayle,
You are too sweet. Glad to hear they were easy to cut out for you and wow thirty beards! That’s a lot of gnomes. Glad you found me and thanks for reading.
Kim
What are the noses made of? I can’t wait to get started on these for myself as well as gifts this year.?
Hi Nancy Jo,
I completely forgot to add them in the supply list thanks for noticing! The noses are solid wood craft balls. There is an Amazon link to some in the supply list if you need them.
Kim
Quick question – are the supplies as listed above enough to make all 3 gnomes or just one? Getting a few girlfriends together for a craft bash and want to make sure we have enough.
Hi Kathleen, That sounds fun! The fabric for the cones is correct. The fabric for the hats I got on clearance and bought a lot more than I needed since this was my first try. You need to make sure the fleece is long enough to make a tall hat. So depending on how it is sold you may need more. Have a look at the fabric on the roll and see if it is long enough per yard or folded in half on the roll. So glad you like my gnomes! Have fun!
Kim
Sweeeet….Making Alabama and Auburn gnomes for my cuz and new hubby. Many thanks.
That sounds so fun!
Kim
I accidentally bought flannel instead of fleece for the hats, do you think I can make that work?? doesn’t have the same stretch to it though.
Oh Sarah, No worries! My first thought was to make the hats plaid!! I sure they will work both ways! The fabric would be much easier to mold into a hat! The felt was flimsy and you had to stretch it to make it roll together seamlessly! I’m sure it will be fine! Good Luck! Send me a pic!
Kim
What are the measurements for the beard and mustache? Thanks.
Each square on the beard photograph are equal to an inch. So 11 inches for the beard and 5 inches for the mustache. Each gnome is different size so make the next set one inch smaller. Dimensions shown are for the largest gnome. Thanks for reading!
Kim
These are absolutely adorable! What a cute and whimsical idea! I definitely need some gnomes in my life :)
Thanks Crystal!! Glad you stopped by!
Kim
Perfect – one of my old college roommates LOVES gnomes, this would be the perfect fun gift to make for her!!!!! Thank you so much for this tutorial, pinning for sure!
I can’t believe all the gnome lovers out there! Thanks for stopping by! Glad you liked them!
KIm
Oh my! These are so adorable!! Thank you for sharing at Turn It Up Tuesday!
extreme cuteness! Pinned Thank you for sharing at the Thursday Favorite Things blog hop xo
Hello cute lady! I’m stopping by to let you know that your holiday gnomes will be featured at our party that starts on Monday at 7 pm. Happy dance time! Pinned and tweeted. We appreciate you! Lou Lou Girls
I LOVE these gnomes!!!!! They are adorable! Thank you so much for sharing with us at The Creative Corner Link Up! Can’t wait to see what you link up next week! I’ll be featuring this fabulous DIY in this Sunday’s party. :) Oh, yes, I’m a new host at The Creative Corner. Just thought I would also quickly introduce myself! Maria. x
I didn’t find anywhere that the stiff black felt was used. also what are the eyes made out of?
The eyes are stiff black felt. Regular felt would be fine.
LUV! They will be sitting outside my classroom door.
Oh, my gosh, I can’t stand it. I will be making these. I love them. My grands will love them, too. Thanks for the inspiration. Putting on Facebook, Twitter also and pinning to Christmas. Wow. Best wishes, Linda @Crafts a la mode
Your gnomes are just too cute. Pining these. Love them!
Thanks for sharing at Turn It Up Tuesday,
Bev
Ahhh. Your gnomes are super cute. Thanks for the fantastic instructions. Best wishes, Darlene. Oh and I pinned of course.
Oh my goodness! Your gnomes are SUPER adorable!! My daughter LOVES gnomes, so these would be the perfect homemade gift for her!! Thank you so much for sharing at The Wonderful Wednesday Blog Hop!
These are SO CUTE! I can’t wait to make them!
Kim,
These are the most adorable gnomes I have seen! Love them! Thank you for sharing with us at Brag About It! Pinning :)
~Laurie
These are adorable! What a fun craft project for Christmas.
Those are so cute! What a fun idea!
Thank you! Glad you liked these little guys! Thanks for reading!
Kim
Hi Kim, I had to pop over to see how you made these little gnomes. I might have to make a few. Thanks for the tutorial. Happy Fall!
Glad you came over! They really are easy to make.
Kim
Oh my gosh, how cute are these? Your tutorial makes DIY-ing these adorable gnomes easy, too. Thank you!
OMG, your gnomes are just too cute. Pinning these. Love them.
Thanks for sharing at Turn It Up Tuesday,
Bev