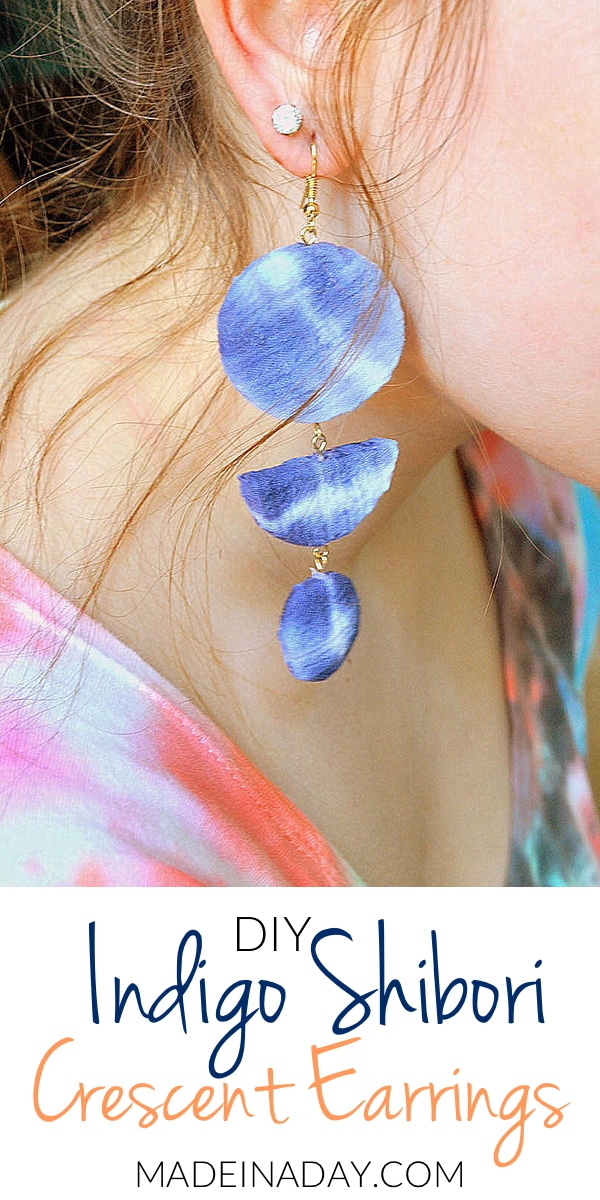
Shibori Crescent Earrings


Do you own something Shibori? If not you need to jump on the indigo tie dye trend soon! Here’s how I joined the Shibori trend this year.
Shibori, or indigo dying, is taking the over for the summer trend this year. Similar to tie dyeing, shibori is folding, twisting, then binding cloth and then dyeing it indigo.
Also on trend, this year are huge dangle or drop earrings. I combined these two fun fashion trends with simple cut foam shapes to make a lightweight version of these usually heavy earrings. These earrings first made their debut on the FloraCraft® Make It: Fun® Blog! Let me show you how to make them!
Disclaimer: Please note that some of the links below are affiliate links and at no cost to you I will earn a commission if you purchase through those links. See my Disclosure + Privacy Policy for more info. As an Amazon Associate, I earn from qualifying purchases.
⚡️NOTICE: Submitting forms for FREEBIES on this site too quickly can trigger our email spam filters. If you stop receiving your Freebie Delivery Emails, please try using a different email address, an incognito window, or you can Contact us to whitelist your email so you can receive them.
Shibori Crescent Earrings
Supplies:
- FloraCraft® Make It: Fun® Foam Balls: (3-4) 1.5″
- Shibori Fabric (or dye your own)
- Decoupage Adhesive
- (8) Gold Jewelry Eye Pins
- (2) Gold Jewelry Earring Hooks
- Jewelry Pliers
- Jewelry Wire Cutters
- Low-Temp Glue Gun & Glue
- Long Blade Razor Knife or Foam Cutter

Instructions:

Using a long blade razor knife or foam cutter, cut the center out of 3 foam balls, about 1/4″ wide sections. These will look like 1/4″ thick discs. Save the ends for the bottom small circles. Then, cut 1 disc in half for the half moon middle section of the earrings.

Find the pattern section on the Shibori fabric you want to use for the earring front. Lay the foam piece on the area of fabric and cut around the shape, leaving enough fabric to fold over at least 1/4 inch.

Apply a light coat of decoupage adhesive to the front and edges of the circle shape. Lay the fabric over the shape, pull and smooth and fold the fabric down on the opposite side of the foam. Add more adhesive the back of the circle and press the fabric down to make it lay smooth.

Cut a circle section out of the Shibori fabric and place it over the folded back fabric and press down to smooth. Add more adhesive to the edges of the circle fabric so it will adhere when drying.

Repeat above steps with all the shapes of foam. Push eye pins into the top and bottom of each section of the shapes to make holes for the pins (see image below). Trim eye pins to size for each shape. Remove pins, add low-temp glue and quickly push it back into the foam shape.
Let them dry completely then gently open and attach each shape together. Add a gold jewelry earring hook to the top circle to finish off the earring.

I just love how these turned out and the fact that they are made with foam makes them super lightweight! They won’t put added stress on your earlobe. These will look great with a breezy summer dress or maybe add a fun pop of color to a summer outfit.
LOVE IT? PIN IT!!
Check out more of my Jewelry Projects~


Great idea for earrings. I made something similar, except I glued handmade paper onto thin slices of wine corks. Mine may be slightly heavier than yours. I’ll have to give the foam a try because I love earrings that aren’t heavy. Thanks for the idea!
Hi Jane,
Thanks so much! I think cork would we really lightweight too! Great idea.
Kim
These earrings are lovely! Thanks for sharing!