Online Shop Thank You Stickers Made with Cricut
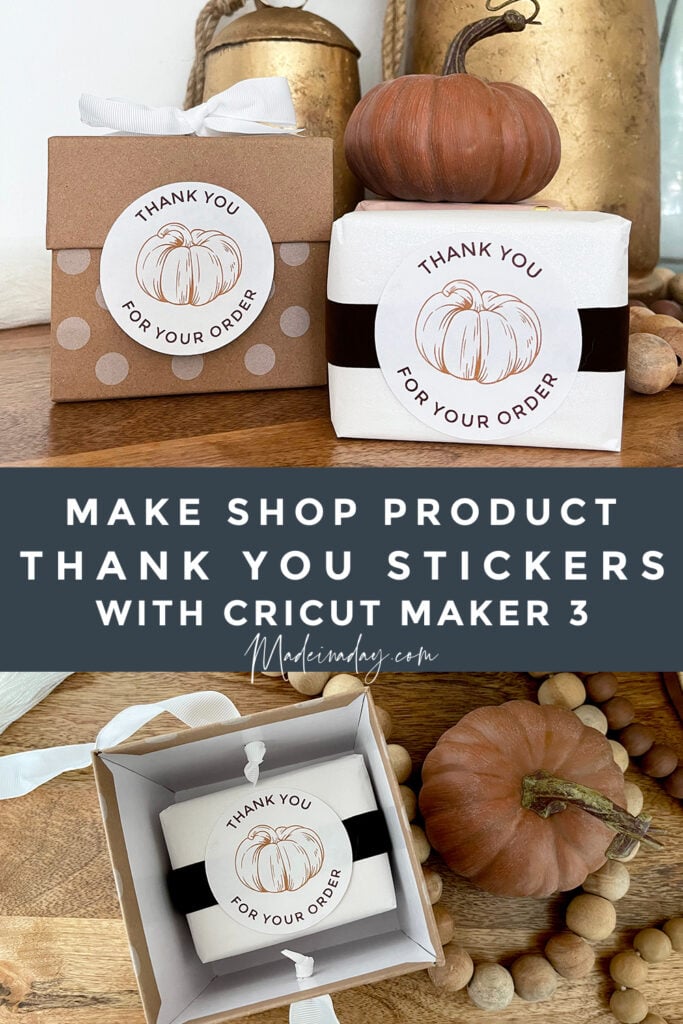
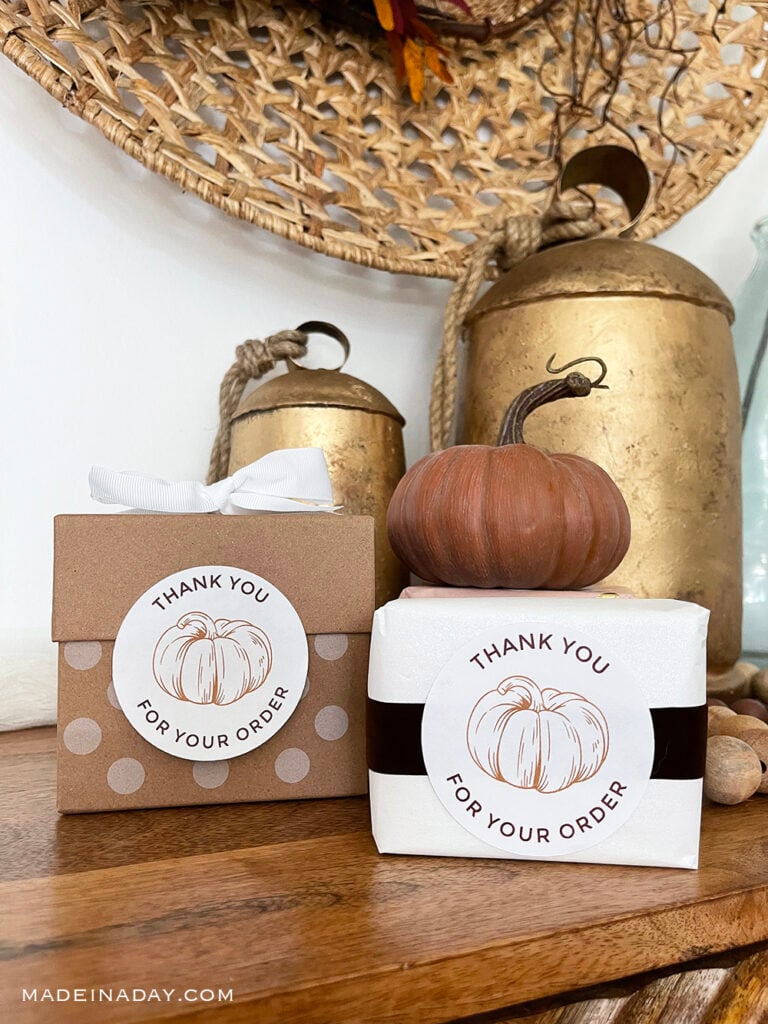
Learn to create your own shop product Thank You stickers made with Cricut Maker® 3. Design, print, and cut stickers to add to packaging for a personal customized product look.

Disclaimer: Please note that some of the links below are affiliate links and at no cost to you I will earn a commission if you purchase through those links. See my Disclosure + Privacy Policy for more info. As an Amazon Associate, I earn from qualifying purchases.
A couple of months ago I wrote about how I’ve mastered selling online on different platforms. I have a shop on Mercari, Poshmark, and Made in a Day’s shop is on Etsy. In my previous post, A Shopaholic’s Guide to Sell Stuff Fast Online I talk about the importance of packaging when shipping your orders.
An important aspect of being successful at selling online is looking professional. If you are selling something that is brand new or gently used, presentation on delivery is very important. Plus it is a way to show off your business branding which will lead to more traffic coming to your online store.
For example, we have all received something in the mail by itself rolling around in a box. But when you receive something in a box and it’s neatly wrapped in fancy paper and there’s a branded personal note or “thank you” sticker. It feels like the person or company actually cares about their customers. It also makes the product or company seem more reliable and valuable to the consumer.
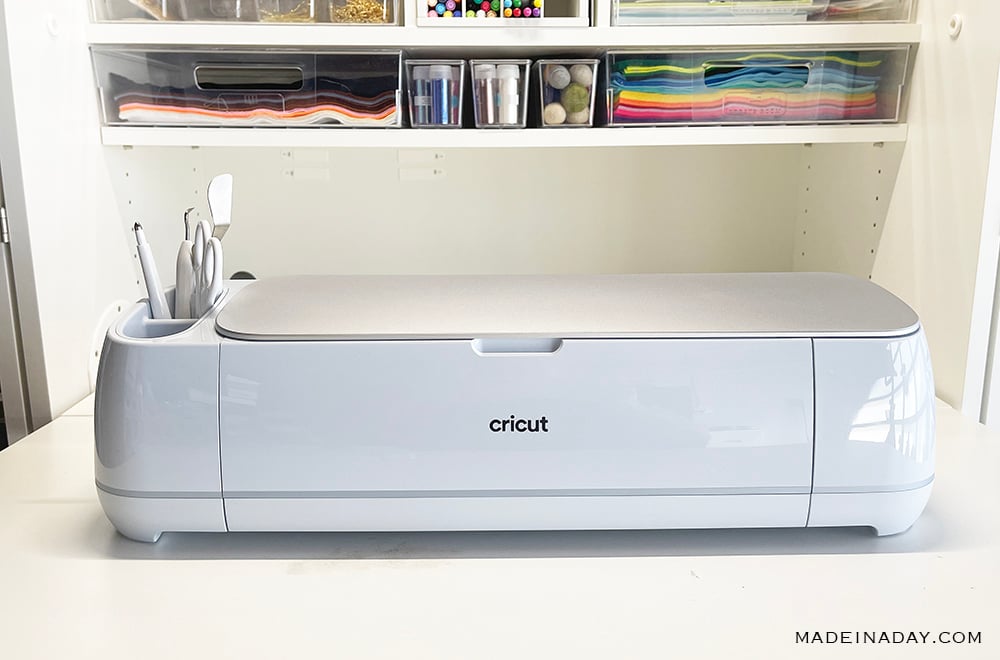
In this post, I am working with my friends at Cricut to show you how to make “thank you” stickers for your products. I am going to show you how to design them in the Cricut Design Space app and make a simple sticker using the “print and cut” method.
“Print and cut” means that you will create the thank you stickers in the Cricut Design Space application. Next, you will print the images on your printer and then cut them out with a Cricut Machine. Cricut Machines with this feature are: Cricut Explore Air®, Cricut Explore® 3, Cricut Maker®, and the Cricut Maker® 3.
Let me walk you through each step. Let’s get started!
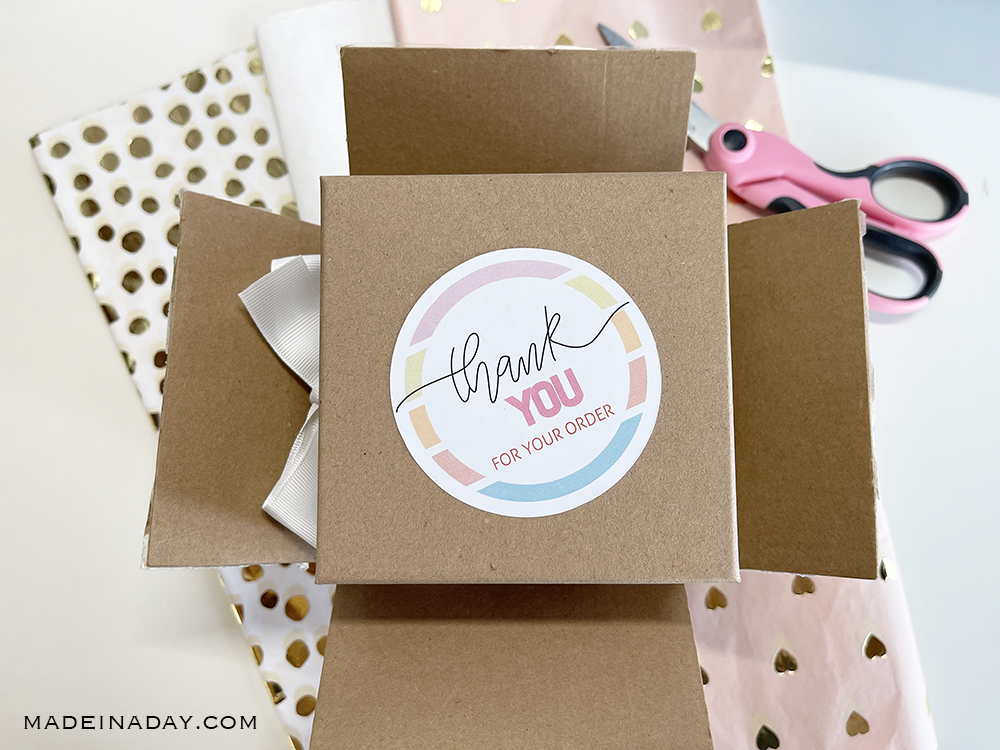
Thank You Stickers Made with Cricut Maker® 3
Supplies:
- Cricut White Printable Sticker Paper
- Inkjet Printer
- Cricut Explore Air®, Cricut Explore 3®, Cricut Maker®, or the Cricut Maker® 3 (Cricut Joy™ does not work with the Print and Cut method)
- Cricut Design Space
- Fine Point Blade
- Blue LightGrip Cutting Mat ( if you are not using Cricut Smart Paper™ Sticker Cardstock)
Do you have a laser printer instead of an inkjet printer? That is ok, just make sure you use sticker paper that is made for laser printers.
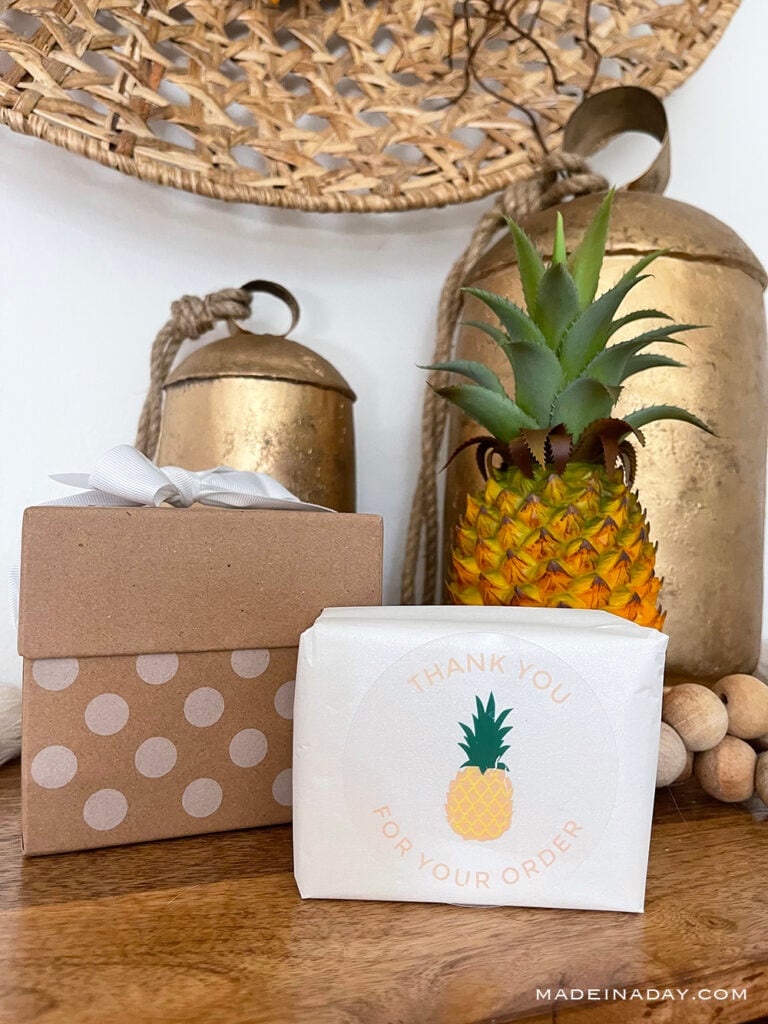
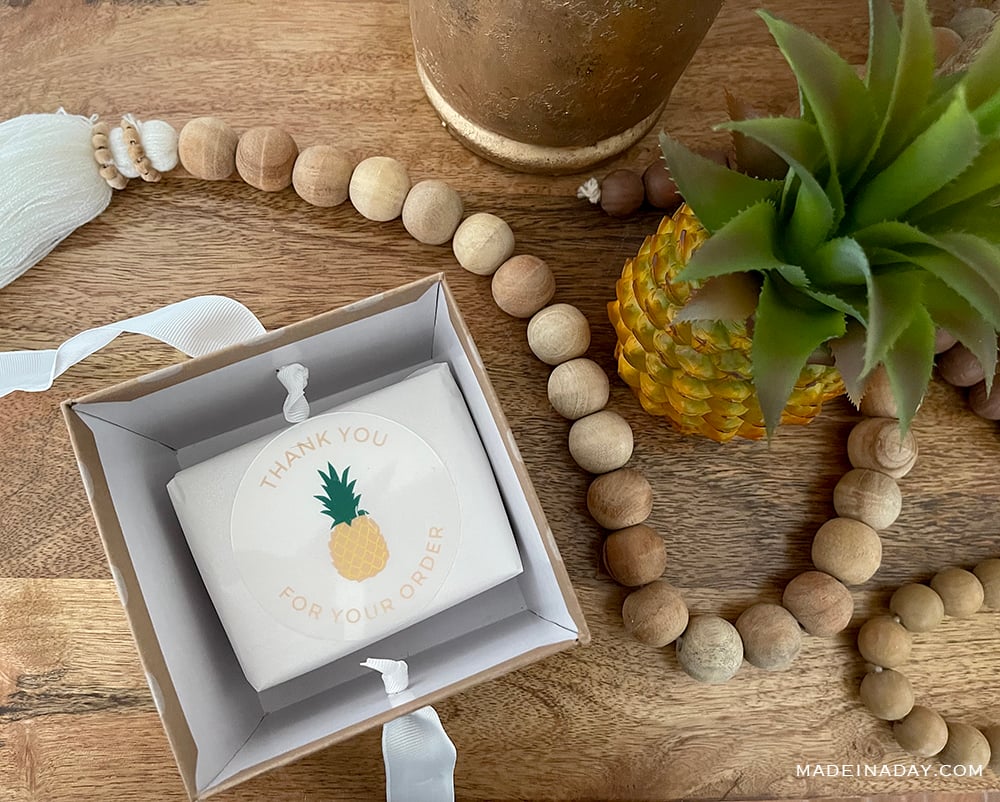
Pineapple:
- Cricut Design Space: Pineapple Shape
- Printable Clear Sticker Paper
- Blue LightGrip Cutting Mat

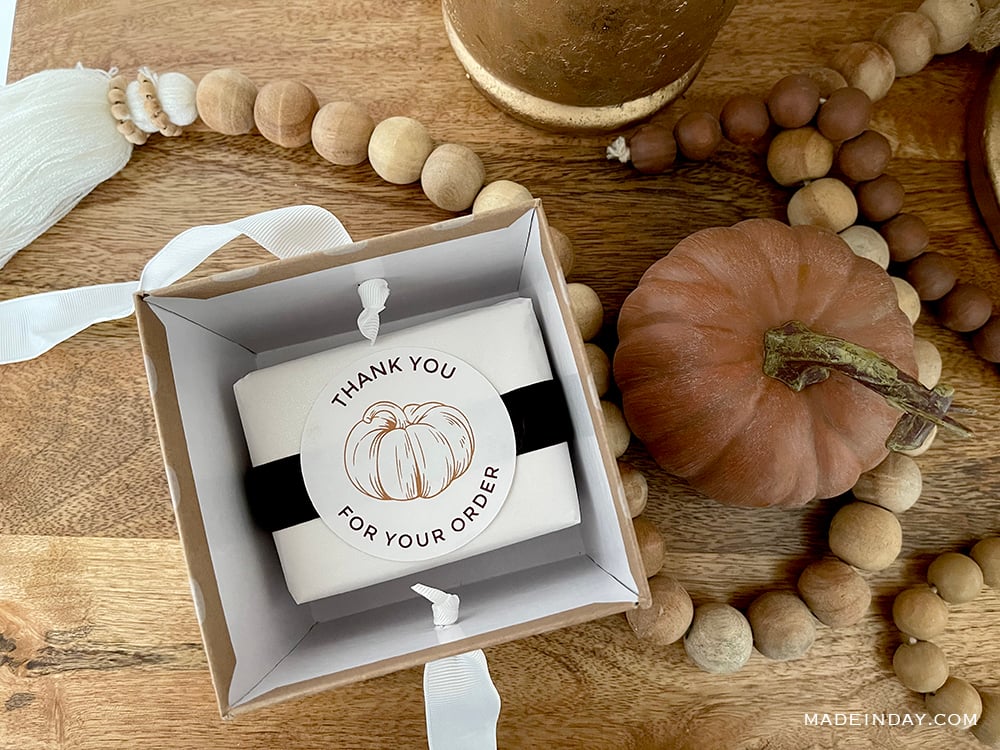
Pumpkin:
- Cricut Design Space: Pumpkin Shape
- Printable Sticker Paper or Smart Paper™ Printable Cardstock
- Blue LightGrip Cutting Mat
Where to Get the Shapes for Cricut Stickers
The image shapes used to make the stickers in this tutorial are located in the Cricut Design Space. You can also upload these image files: .png or .jpeg or .svg. to Cricut Design Space and use your own images. That option is great if you want to use your own business logo.
Instructions:
Round Edge Stickers
- Open Cricut Design Space on your computer and click the + New (Project) on the top left column.
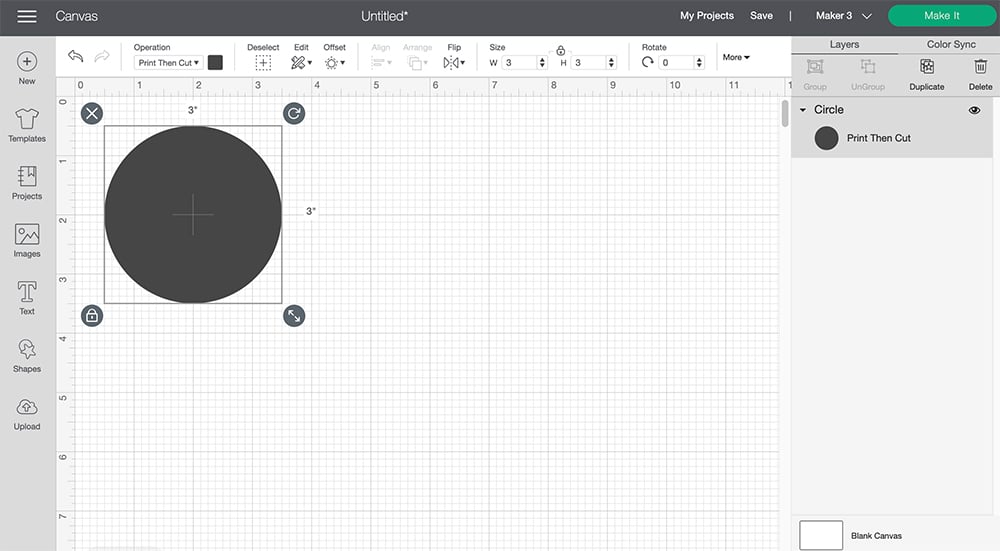
- On the left sidebar click Shapes and choose a circle.
- Click on the circle and using the arrows in the bottom left corner resize the circle the size you prefer. You can also change it on the top bar under Size>Width and Height. I used 3 inches for my large stickers.
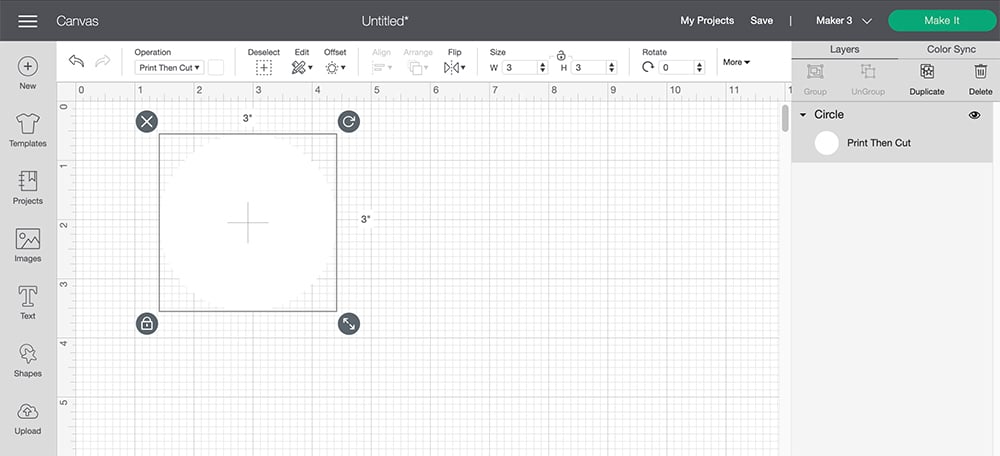
- Next to the Operation tab on the top bar, click on the Color Picker Box (small grey square box) and change the color to white.
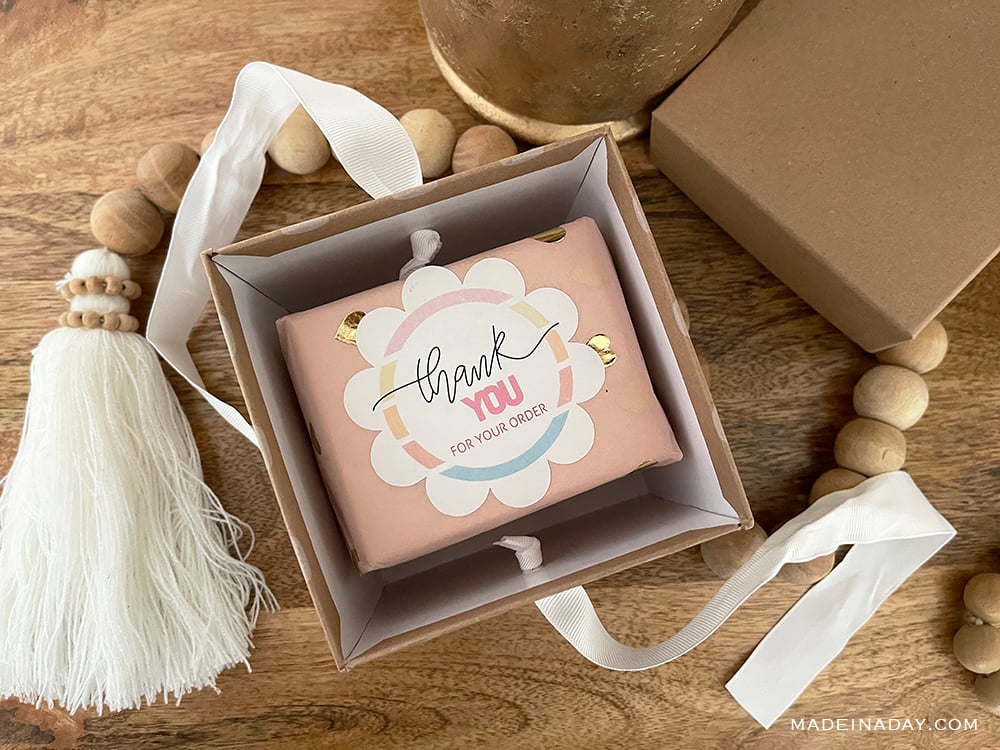
Scalloped Edge Stickers
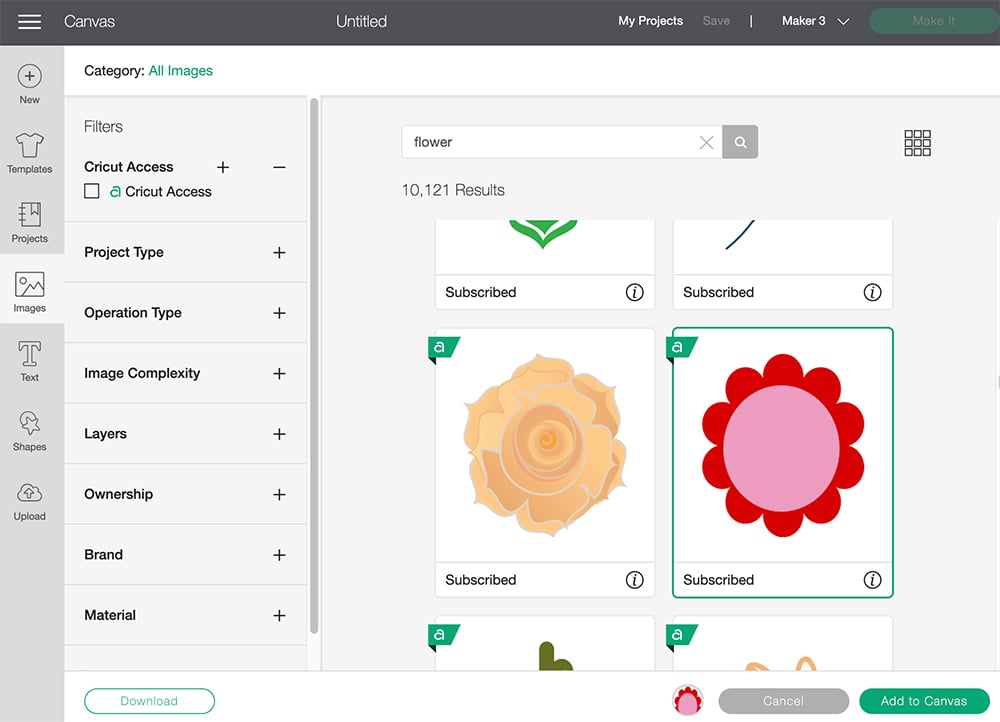
- To make a scalloped edge for your sticker, click on Images and type “flower” into the search bar.
- Choose a flower with a scalloped edge and add it to the canvas.
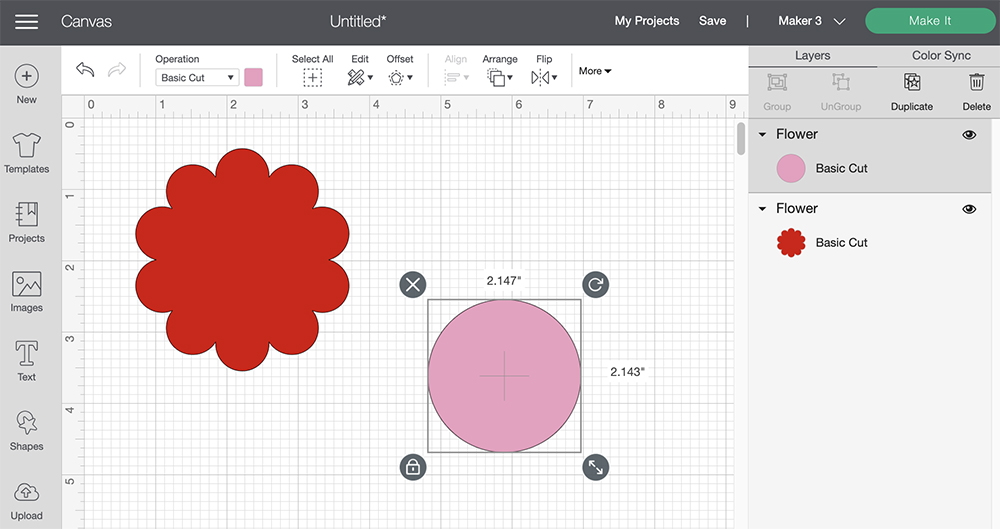
- Click on the flower to choose all layers and right click and choose Ungroup (or Detach).
- Separate the two images by dragging them apart. You will use one layer of scalloping as the base.
- Delete the pink circle layer by clicking it and then click delete or right click on the image and click delete from the dropdown list.
- Next to the Operation tab on the top bar, click on the Color Picker Box (small red square box) and change the color to white.
- Proceed to the next step.
Add the “Colorful Image” Layer
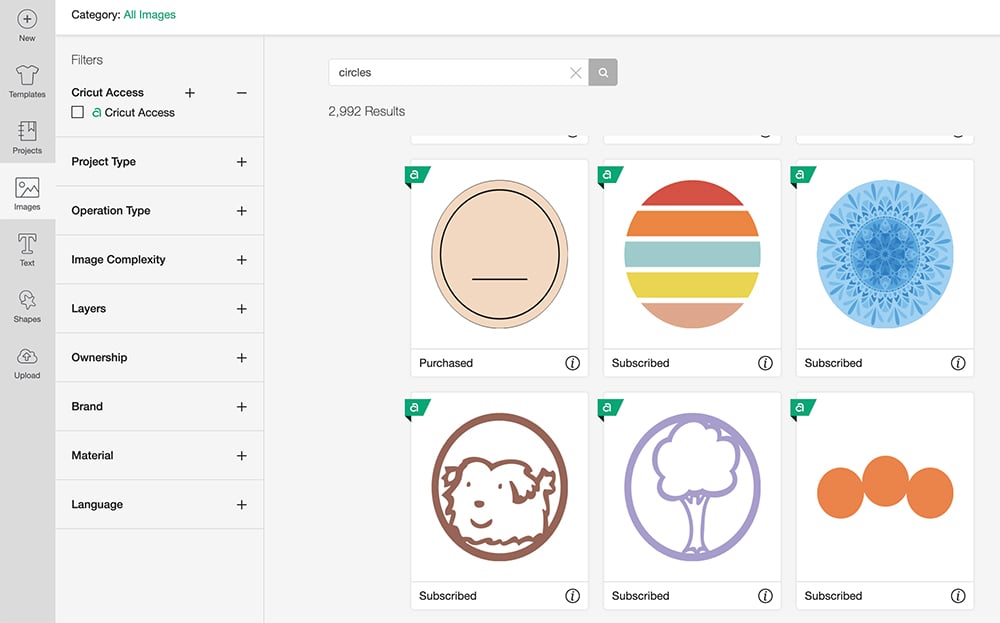
- Click Images on the side bar and type in the word “Split Circle” in the search bar. Find the vintage sun circle like shown in the pic (or the pumpkin or pineapple if you are making one of them instead). I did a search for the words “Pineapple” and “Pumpkin” for my other stickers.
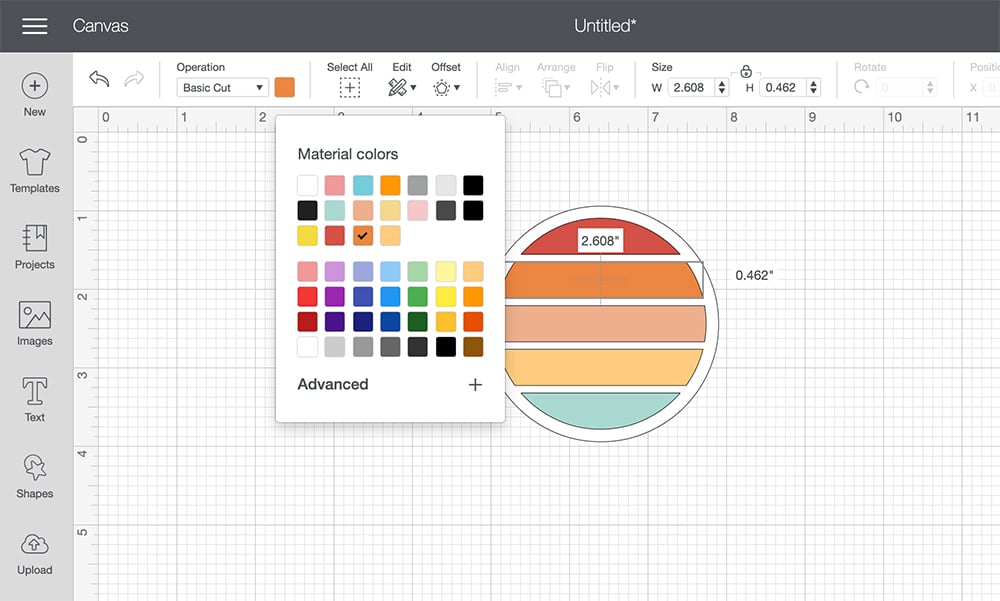
- Click on the vintage sun image and resize it using the arrows on the bottom right corner. Give it a small border within the white circle.
- Change the color of each of the elements within the circle by clicking on each color element on the right layer bar. Then change the color using the Color Picker Box next to the Operations tab on the top bar.
- Click on the Shapes tab and add another circle.
- Change the color to white with the color picker and move it on top of the vintage sun circle. Resize it to fit over the vintage sun image.
Add the “Thank You” Wording
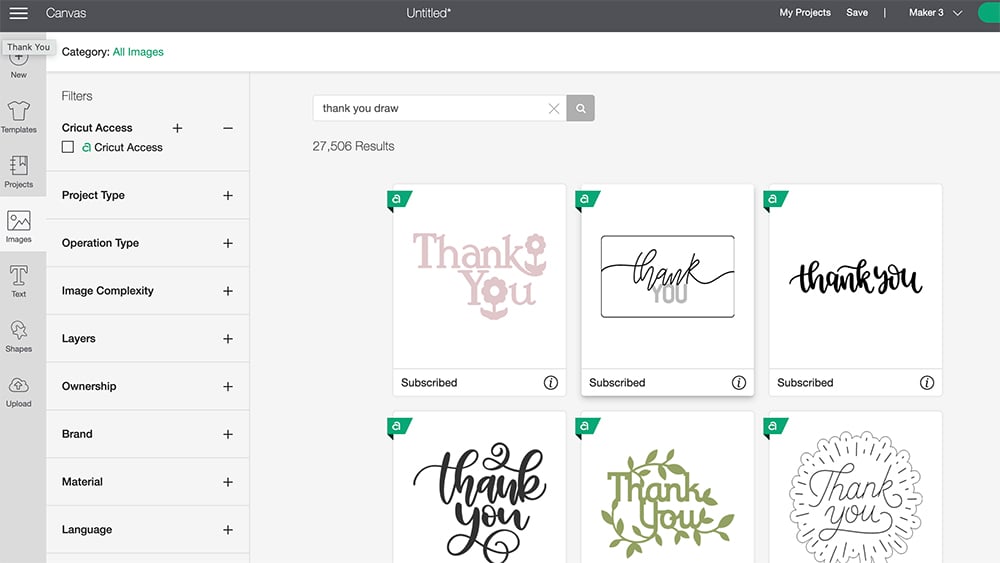
- Click on the Images tab on the left side bar. Type in “Thank You Draw” into the top search bar. Find the Thank you image. Click and add it to the canvas.
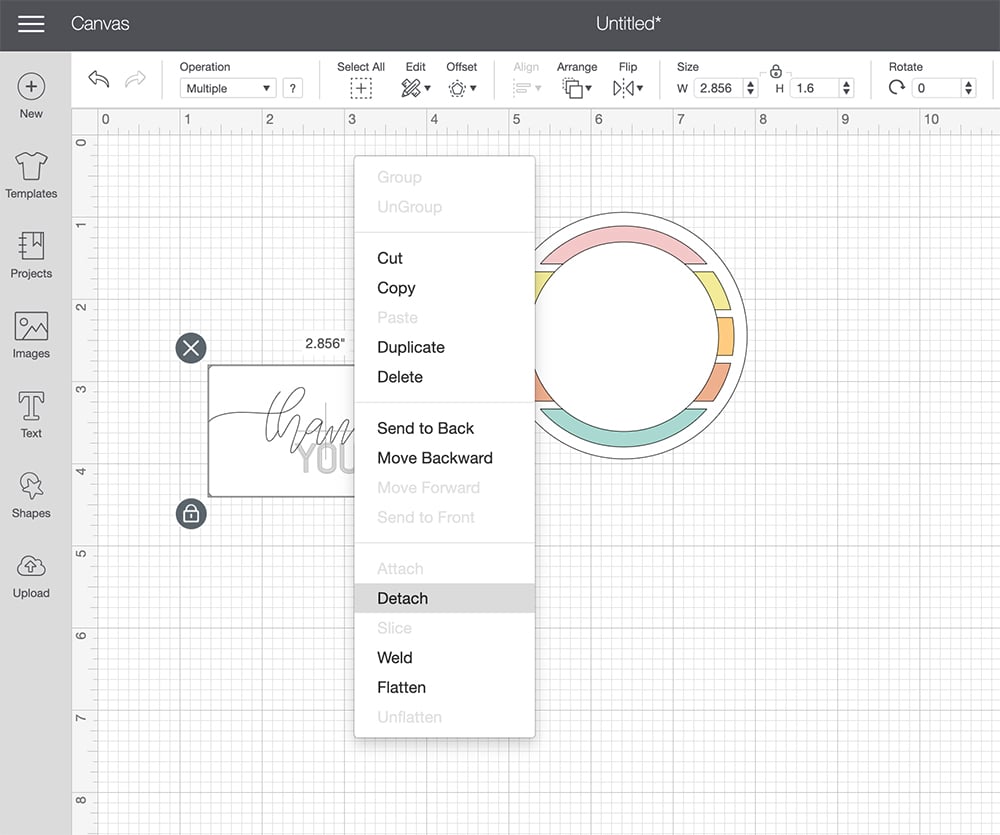
- Click on the image and then right click to open the image dropdown options. Click Detach. This will make each piece of the image a separate image.
- Drag both pieces of the “Thank” and the “YOU” over the vintage sun and other layers.
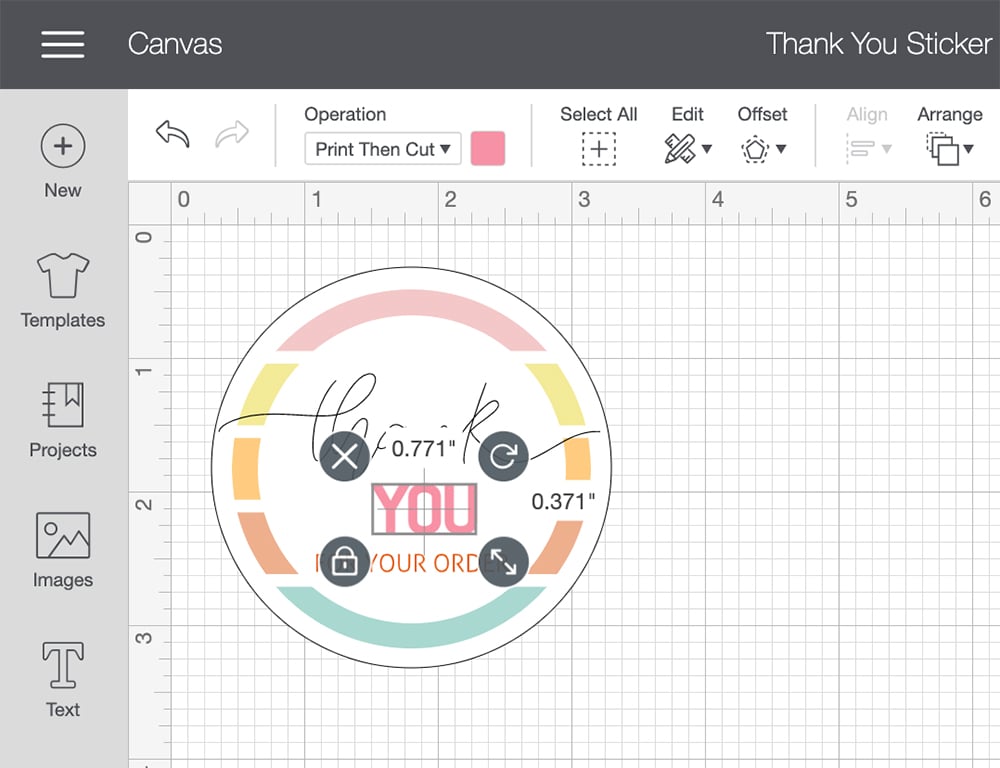
- Click the “YOU” and use the Color Picker Box next to the Operation tab to change the color to pink. Move them around to arrange them in the circle.
- Click Text on the left sidebar and type “FOR YOUR ORDER” in all caps using the Montserrat Font size 10. Drag the words into the top white circle.
- Change the color to the text to orange under the color picker box next to the operation tab.
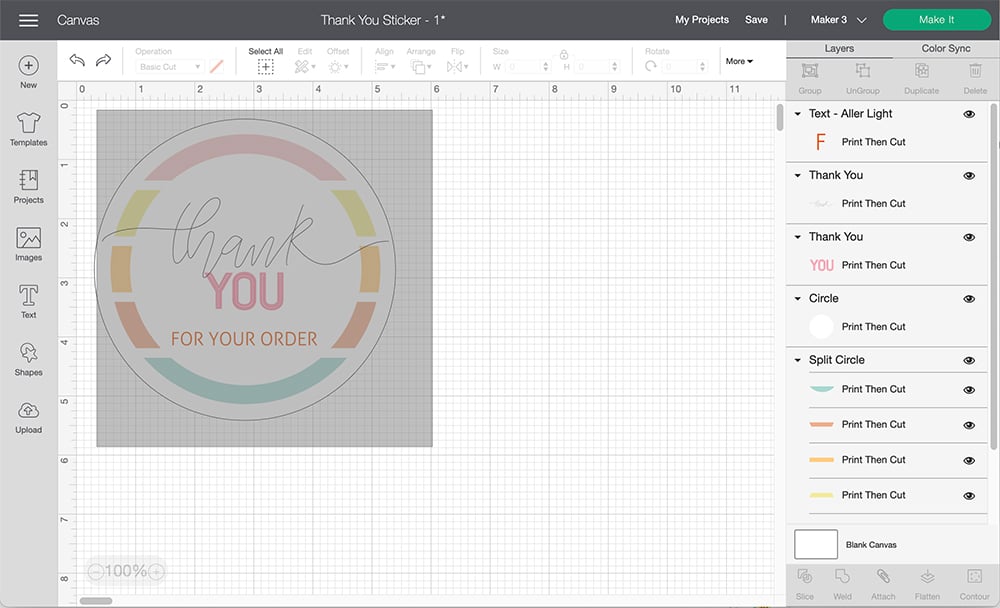
- Click above the left top outside of the circle and drag your cursor over the image to select all of the layers (the grey area above). Or hold down the shift button and click on all of the layers on the right bar. Click Group at the top of the list to join the layers and create one solid image.
- Click on the grouped image and under the Operation tab drop down list choose Standard under Print and Click at the bottom. Right click on the image that is now a group and select Flatten.
If you do not remember to FLATTEN your image, the material load print version in the next step will not show up as a group. The layers will be scattered within the cut perimeters.
Printing and Cutting Out the Stickers
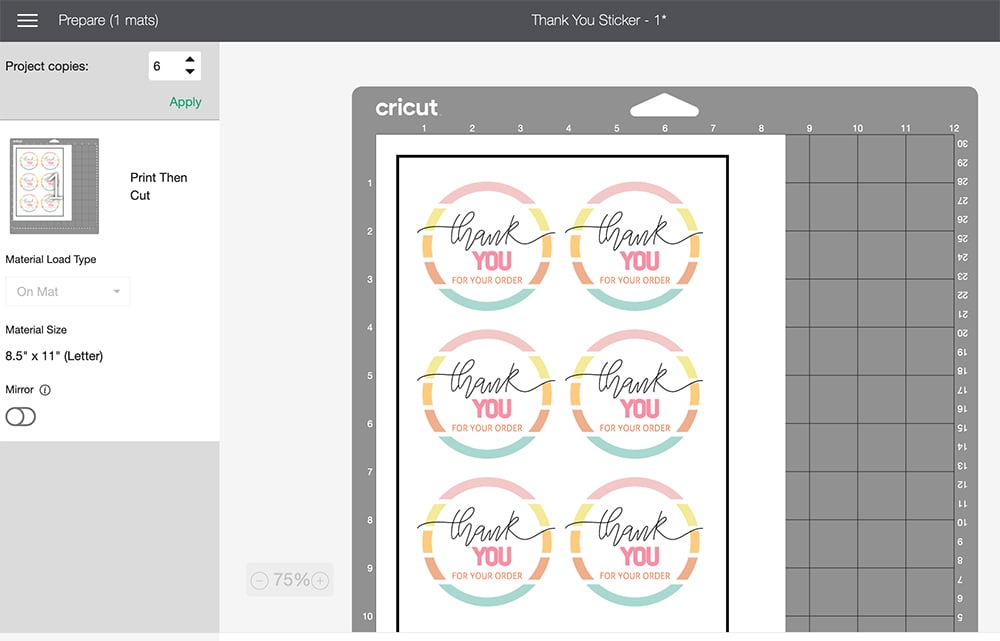
- Click the green Make It button on the top right corner of the design center.
- Select how many items per page on the top left drop down. You will be able to get 6 items per page with a 3 inch sticker. If you would like to have more on one page. Go back in and resize your final sticker image to make it smaller.
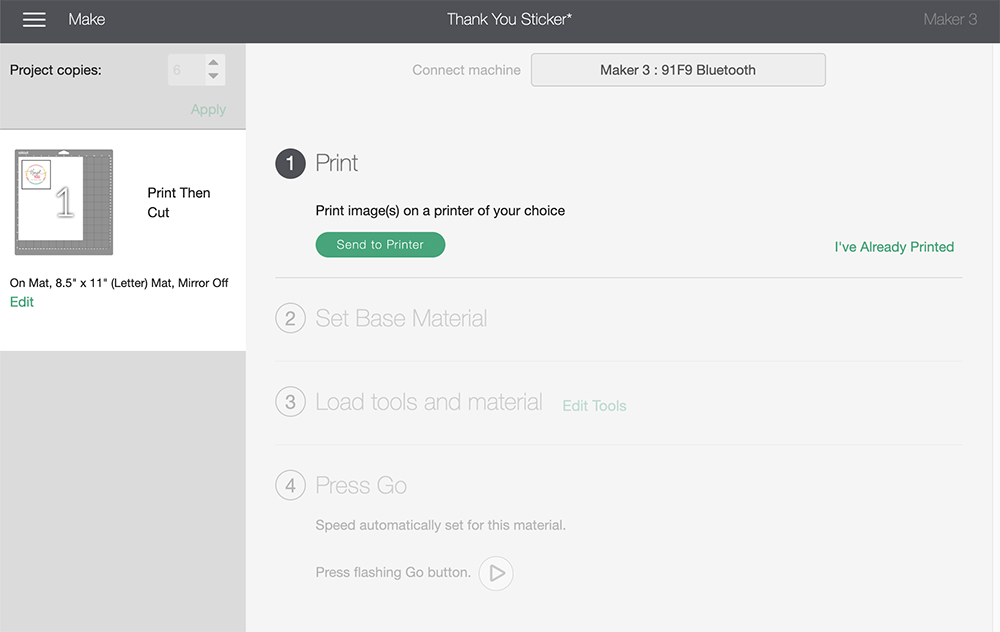
- Add your sticker paper to your printer. Click the green Send to Printer button to print the stickers.
Tip: I always do a practice print with the stickers first on a regular sheet of copy paper to see which side of the paper the prints will come out on. Some sticker paper must be put into the printer face down to print correctly. This way you will not waste a piece of sticker paper if you have it placed into the printer the wrong way.
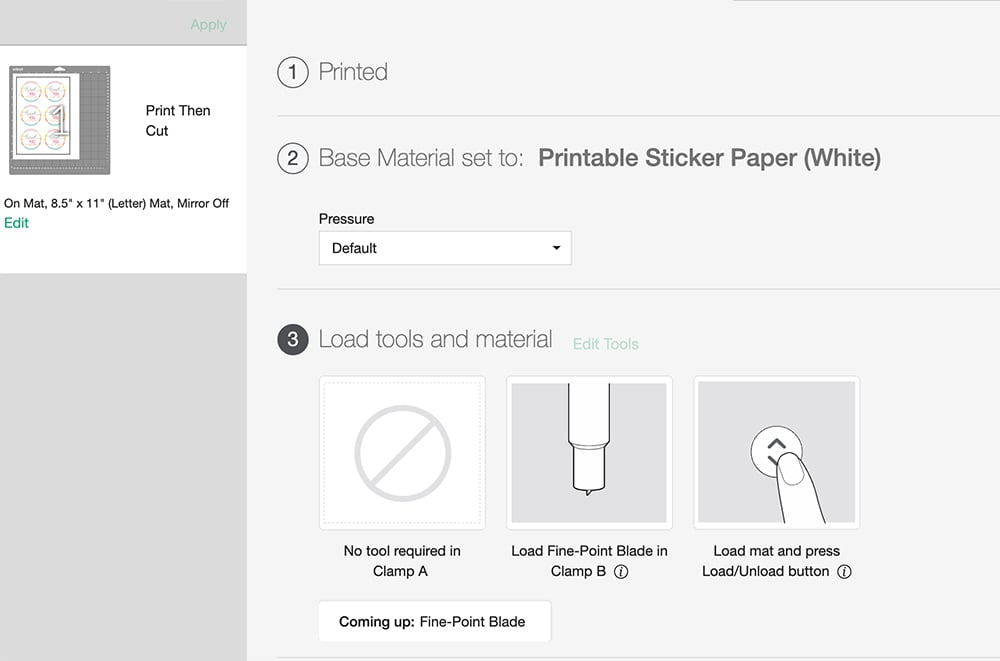
- Choose your set base material (paper). Click Browse All Materials and type in the word “sticker” into the search bar at the top on the next page. Click and choose the paper you are going to use.
If you are using Smart Paper™ Sticker Sheets you do not need a mat. Just load the printed sticker paper directly into the Cricut machine after printing the stickers. If you are using any of the other sticker paper options you will need a mat. Use the “Light Blue” LightGrip Cutting Mat for stickers.
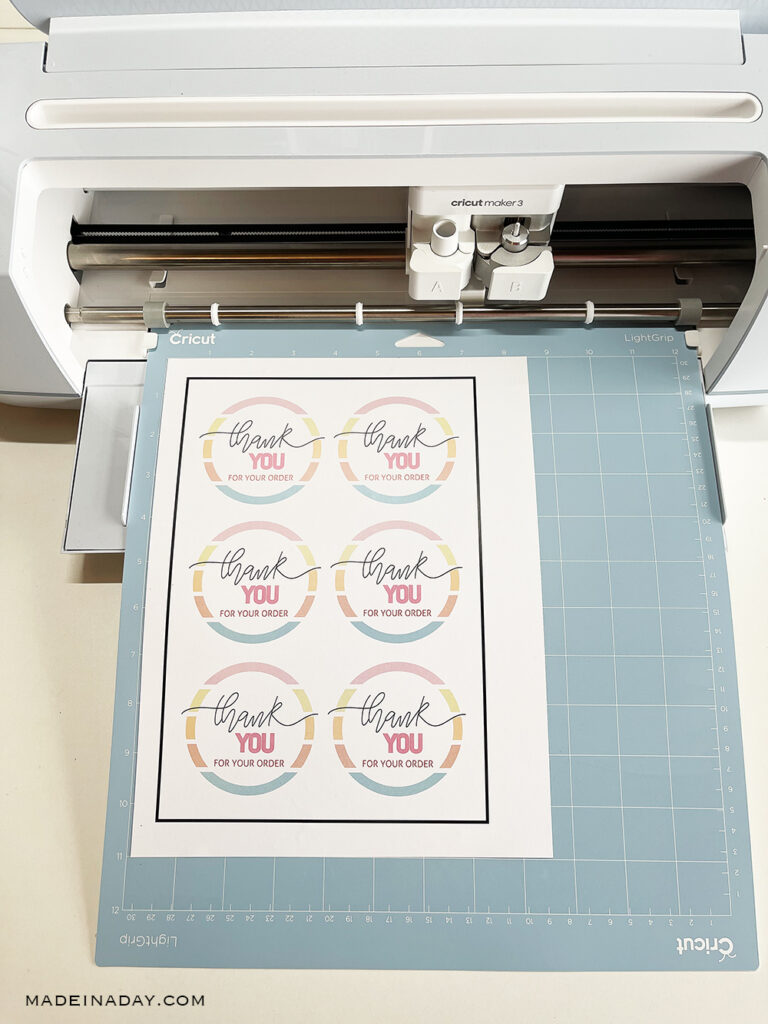
- Place the sticker paper print on the mat and click the “blinking” Up and Down Arrow Button on your Cricut Maker® machine to load the mat.
- Once it is loaded then click the Right Arrow Button to start cutting.
- Once the Cricut Maker® machine is finished cutting, unload the mat and your stickers are ready to use!
There are many steps in this tutorial on how to create stickers made with Cricut machines. Once you know how to make one set of Thank You stickers the options are endless and you can whip them up in no time.
I hope you have found this tutorial helpful and you are now feeling ready to try making your own business Thank You stickers made with Cricut!
Love it? Pin it!
