DIY Round Wall Shelf from a Cheese Box

Upcycle a cheese box into a trendy round wall shelf that adds charm to any room. Explore our step-by-step tutorial for a crafty home makeover! Super easy DIY! For more fun DIY’s see my Home Decor page.

I am going Geometric crazy lately! Who doesn’t love all the crazy shapes and cool retro decor trending now? One thing I am really loving is round wall shelving!
They are just so cute and so simple-looking. I knew I wanted to get my hands on one. Doing some research, boy did I find out just how pricey they can be. They are going for anywhere between $50 and $400 online. Yikes! Enter my vintage cheese box!!
Disclaimer: Please note that some of the links below are affiliate links and at no cost to you I will earn a commission if you purchase through those links. See my Disclosure + Privacy Policy for more info. As an Amazon Associate, I earn from qualifying purchases.
⚡️NOTICE: Submitting forms for FREEBIES on this site too quickly can trigger our email spam filters. If you stop receiving your Freebie Delivery Emails, please try using a different email address, an incognito window, or you can Contact us to whitelist your email so you can receive them.
I picked up this cheese box a while ago, you will probably recognize the lid from my Tassel necklace pic and other posts. I love it and use it all the time for backdrops to posts when taking photos.
I’m thinking I have to sacrifice it to make this a cute and trendy round shelf using the deep base side of the box.
And stay tuned, I am also making a matching cheese box Wall Vase out of the lid in my next post! Here’s how I made this one~
DIY Round Wall Shelf from a Cheese Box
Supplies:
- Round cheese or wine box
- Gorilla Wood Glue
- Jute rope
- Hand Drill with a large bit
- 5 x 24 x 1/4 inch Birch plank
- Hand saw
Instructions:

Measure the base of the cheese box you are using.
Cut your wood down to fit snugly across the center of the box. I used the small leftover piece of wood and made a wood separation for a more geometric look.

Before I glued the shelves in, I drilled two large holes on either side of the top of the box.

Feed the jute rope through the holes and tie it into a tight knot. Repeat with the other end of the rope and pull tight.

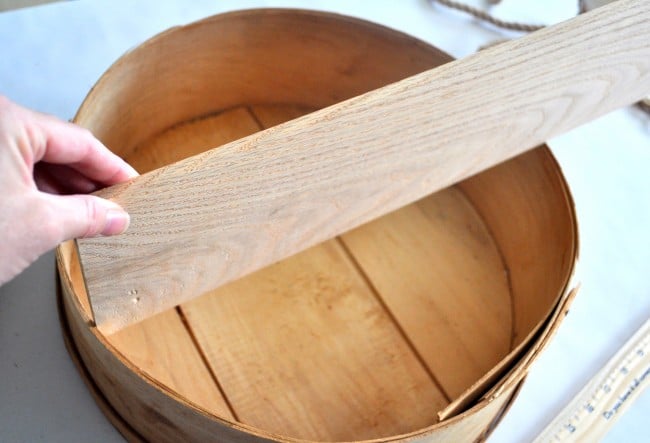
Measure and cut your wood plank with a hand saw, or ask the great people of Lowe’s to cut it for you like I did!
Place your wood inside the box and draw with a pencil where the plank will be placed.
Add glue to the plank and place it in the area you marked inside the box. Add extra glue wiping off excess as you go.
Add the second plank and repeat the above steps.
Let it dry and add more glue where needed to make sure the wood is stable.
Cheese boxes are not perfectly round so the wood won’t be exactly snug everywhere.
Fill with glue and let the adhesive dry for 24 hours. And that’s it! Hang that cutie up, add some chachkis and you have instant style!

Antique Cheese Box Round Wood Wall Decor
Super cute! I’ll be featuring this at Merry Monday!
Great idea! I always see these cheese boxes around. Pinned
Hey, Kim ~ I LOVE this project! So creative, and I love adding some circles to my walls. I have far too many rectangles and squares. :0) Hope you’re having a great week!
Thanks Tiffany! They turned out so cute I love them! Thanks for reading!
Kim, this is so adorable and so darn clever!
Love it!
Pinning!
Karen
Thank you Karen!
Kim
Oh I LOVE this! What a fab and easy idea. Wish I’d come up with this ;) This would be perfect for my baby’s nautical/coastal nursery that I’m putting together. Love it :) x
Thanks so much Maria! They were so simple to make. Thanks for reading!
Kim
I just love your shelf! I have a wall that is just needing this so bad, now I just need to find the perfect cheese box.
Hi Kim, that is such an awesome idea!!!