How to Make Natural Wood Bead Tassel Earrings

See how I made my new favorite earrings for summer! My How to Make Natural Wood Bead Tassel Earrings tutorial will walk you through how to create these super cute beauties for your wardrobe. For more fun jewelry projects see my Fashion + Jewelry page.

We spent our spring break in Charleston, South Carolina this year. Yay! We love meandering through the streets, eating the best seafood and shopping at some of the neatest shops in downtown.
One afternoon, I saw a young girl pass by me and she was wearing some very cool looking wood bead tassel earrings. I only got was a quick look at them but those earrings stayed with me throughout the trip.
Disclaimer: Please note that some of the links below are affiliate links and at no cost to you I will earn a commission if you purchase through those links. See my Disclosure + Privacy Policy for more info. As an Amazon Associate, I earn from qualifying purchases.
⚡️NOTICE: Submitting forms for FREEBIES on this site too quickly can trigger our email spam filters. If you stop receiving your Freebie Delivery Emails, please try using a different email address, an incognito window, or you can Contact us to whitelist your email so you can receive them.
I knew I needed to make them since they were all I could think about. I experimented making just the right flair on the tassel. I think I perfected the look of the tassel.
I left the tassels a bit undone for a more loose look. I made three pairs of these cuties and I am in love! They are my new go-to earrings for summer this year.
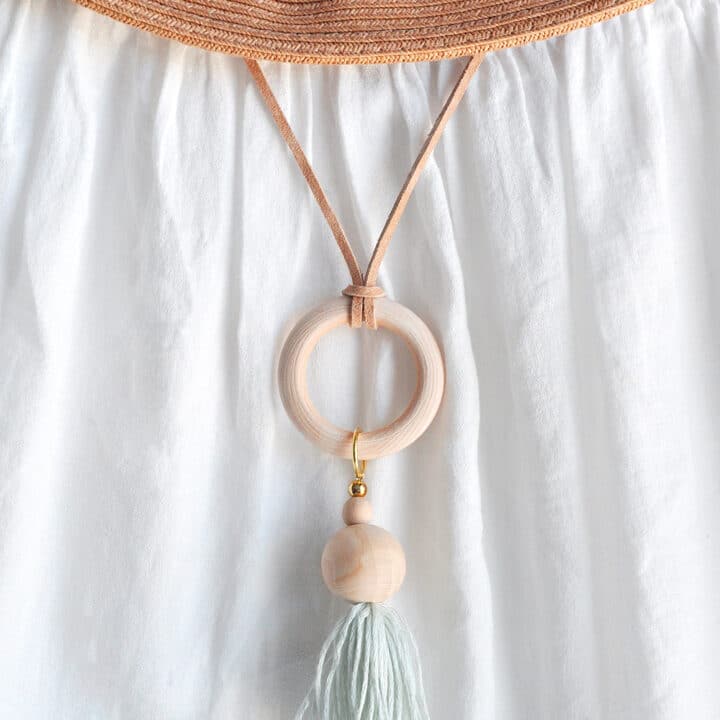
I bought a huge set of embroidery floss on Amazon since I am always going to the store for it. Now I can make these until the cows come home! I think I may need a necklace to match.
They are so super easy to make. Let’s get started!
How to Make Natural Wood Bead Tassel Earrings
Supplies:
- Wood Bead: (2) 25mm/1-inch, (2) 9mm
- Acrylic Gold Bead (2) 5mm
- 2 Earring Hooks
- 2 2-inch Eye Pin Findings
- Beading Pliers: Round Nose Pliers, Wire Cutting Pliers
- Embroidery Floss: 1 Skein Per Pair of Earrings: Peach, Grey, Light Blue/Green
- Cardboard Square 5-inch x 5-inch
- Hot Glue & Gun

Instructions:

I used 1 skein of embroidery floss per pair of earrings. Remove wrapper from floss and unravel thread. Cut the floss in half, making two sections of 4.3 feet of floss.
Set one half of floss aside. Wrap the floss evenly around the cardboard square.

Slip floss off of the cardboard. Cut a 3-inch section off the end of the end of the floss. Tie the 3-inch floss in the center of the wrapped floss.
Add a dot of glue to the simple knot and knot the floss again tightly.

Fold the floss in half. Open the eye pin with the round nose pliers and slip the tie you made into the eye pin loop and close the eye pin.

Add the large wood bead, small wood bead and gold wood bead to the eye pin.

Trim the end of the eye pin down.

Grab the end of the wire with the round nose pliers and roll to make a loop on the end. The trick to these earrings is getting the eye pin small enough to make the beads really tight, so the tassel will flair out.
If you get the beads and tassel too loose, just undo the end of the eye pin, trim it smaller and loop it again.
Add your earring hook and close the eye pin loop. Trim the tassel down to 1.25 Inches. Repeat for the other earring.

I can’t figure out which set I love the most! I am going to be wearing these with everything.
LOVE IT? PIN IT!

More Jewelry Projects:
My Must-Have Amazon Jewelry Resources:

See more of my Jewelry Projects~


Thank you for sharing your lovely projects.
Hi! I ordered the supplies you linked for the wood bead and embroidery floss tassel earrings. Thanks for linking! The pins that I ordered are 1”. Thinking you used a longer pin. I followed what you linked. Am I missing something? Thanks for your help!
Hi Priscilla,
Yes, it was a 2-inch eye pin finding I used for these earrings. I am so sorry that the link was incorrect. I must have been in a hurry when I added it and di not look at the size on Amazon. You can find these at your local craft store as well.
Kim
I love your easy to follow tutorial. I have some wood beads and even some small spools that I could use to make these. I need to pick up some jewelry finding, but I’m ok with that :-)