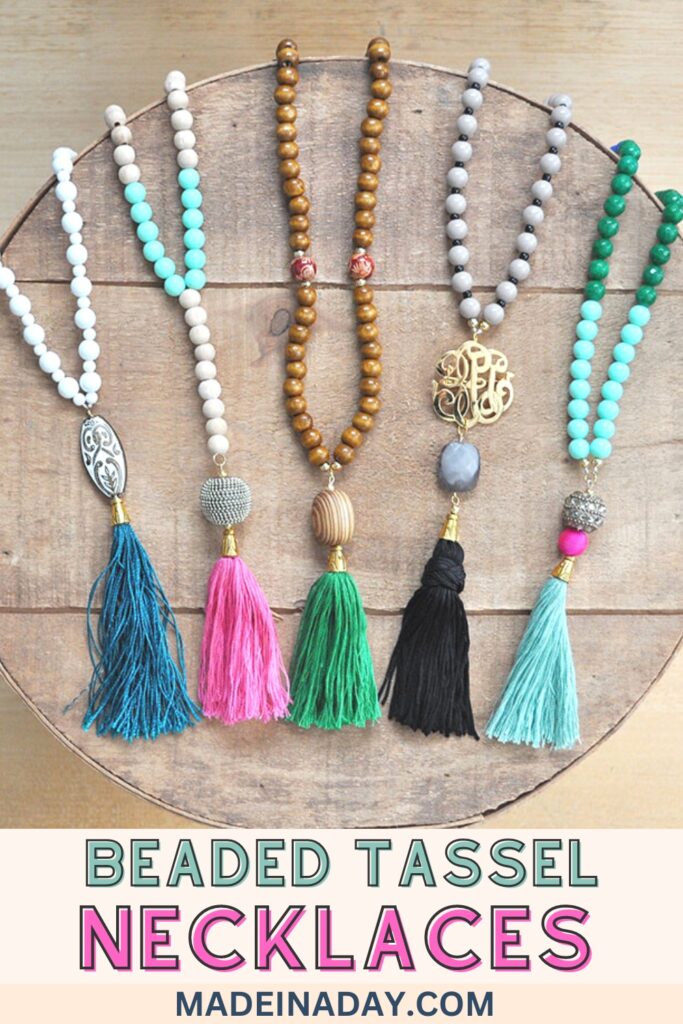
How to Make Trendy DIY Beaded Tassel Necklaces


Make your own DIY beaded tassel necklaces 2-ways. Use nylon cording to create these popular fashion statement necklaces at home! Add a beaded capped tassel to finish it off. For more tassel projects see my DIY Fashion page.

I’ve decided I am totally addicted to tassels! The Buddha-type tassel necklaces with wood beads are my favorite kind to make. The nice ones can be pretty pricey so I decided to make some of my own. Surprisingly, they really were pretty easy to make.

This is a two-part post, this is how to string the beads and then you need to know how to make the Capped Tassels with Beads. Follow that link and make your capped tassels and then come back here to put them altogether.
Disclaimer: Please note that some of the links below are affiliate links and at no cost to you I will earn a commission if you purchase through those links. See my Disclosure + Privacy Policy for more info. As an Amazon Associate, I earn from qualifying purchases.
⚡️NOTICE: Submitting forms for FREEBIES on this site too quickly can trigger our email spam filters. If you stop receiving your Freebie Delivery Emails, please try using a different email address, an incognito window, or you can Contact us to whitelist your email so you can receive them.
More Bead ideas you will Love


NOTE: I found there a couple of ways to make these necklaces. In this post I describe two different ways, with two different types of string.
I first tried the beaded wire necklace method. It came out a little wonky and did not hang naturally. I then tried making these necklaces with nylon string and they turned out great!
I added the bead wire instructions in case you want to try it out but the nylon string works best.
DIY Beaded Tassel Necklaces
Supplies:
NYLON STRING BEADING METHOD
- 40-60 Round Wood Beads: 9-10mm, brown or natural
- 1mm Waxed nylon cording
- E6000 Adhesive
CHECK THE COMMENT SECTION AT THE END OF THE POST FOR MORE TIPS
Waxed coated nylon cording is perfect for this project. The wax makes the cording non-slip when tying off the ends. The knots stay tight at the end while you are adding the glue
WIRE BEADING STRING METHOD
- BEADALON 7-Strand bead stringing wire
- Crimping beads
- Flat smooth beading pliers
- Jump rings to add tassels
FOR BOTH NECKLACES
Instructions:
Waxed Nylon String Method (preferred method):

Cut a 4-5 foot section of nylon string and add a not in one end so the beads will not fall while adding them to the cording,
Add all of your beads. 40-60 beads per necklace.

End the necklace by tying the ends together with a double or triple knot and adding a dot of E6000 adhesive to keep the nylon string from unwinding.
Add your beaded tassel using a jump ring. You may need a large jump ring for it to fit between the beads. The supply list has a set with different sizes.
Beaded Wire Method:
Cut a long piece of beading wire, around 4-4.5 ft.
Start with a crimped bead on one end, then a small bead and then add your larger beads in various patterns.
When you end the necklace, the end will be in the front where you attach the tassel instead of the normal back of the neck area.
For more details on how to crimp and finish a beaded wire necklace or bracelet see this video by Beadaholique.
Then add your tassel with a jump ring.
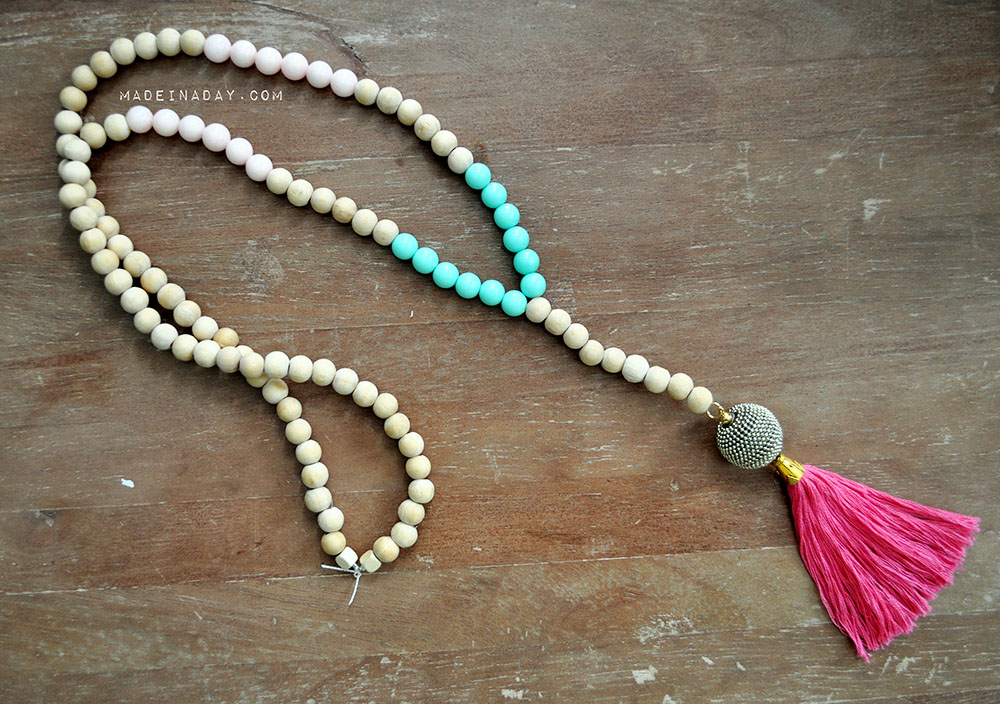
Y Shaped Necklace:
Cut a 4-5 foot piece of cording, add a jump ring to the center and fold the string in half.
Feed your first 10 or so beads through both ends of the cording.
Then after the ten beads split the cording and add the rest of the beads to each end.
Tie it off with a triple knot and add a dot of glue to secure it.
MORE NECKLACE FAVS


The real way to make the Buddha prayer beads would be to add a knot between each bead as you go.
Although I love the way that looks, I really do not have the patience to make that many knots and getting them even between each bead.
I hope you enjoyed this post! Everywhere I go, I get so many compliments on these DIY beaded tassel necklaces. I hope you will too when you make yours!
Love it! Pin it!

I love the necklaces. Thanks for sharing the tutorial. I am sorry if this is someone obvious but I am totally new tp this craft:) how do we put the tread through the bead? I bought the beads and the tread on Amazon though your link so I am using the same materials you used on the tutorial but holes on the beads seems pretty small. Is there any tool I can use? Thanks!’
Hi Virginia, Hmm you may have gotten a bad batch of beads. I have not had that issue before. You can use a large eye needle used for yarn if you have one. Or take a piece a small piece of plant wire and fold it in half over the thread and then put the wire through the bead pulling the thread along with it.
Love these necklaces and wanted to try and recreate the one with the monogram. I was just wondering if you know where you got yours or if you could direct me to a place that sells similar ones.
Hi Lana, You can find the monogram pins on Etsy.com!
Hey girl, great post! I’m making these tonight :-) Thanks so much for sharing your wonderful easy project ideas. This will be my third Kim creation and I’m super psyched for my awesome new necklace :-)
Thanks so much, Elizabeth!
Hi just a quick question! When using the nylon string how do you attach the tassell? I love these btw beautiful!
Hi Rebecca,
You would add a jump ring to the tassel and string it right onto the string. Add beads on either side of the tassel. See my capped tassels post on how to construct the tassel for these necklaces. Link to tassels is in the post and below it.
Kim
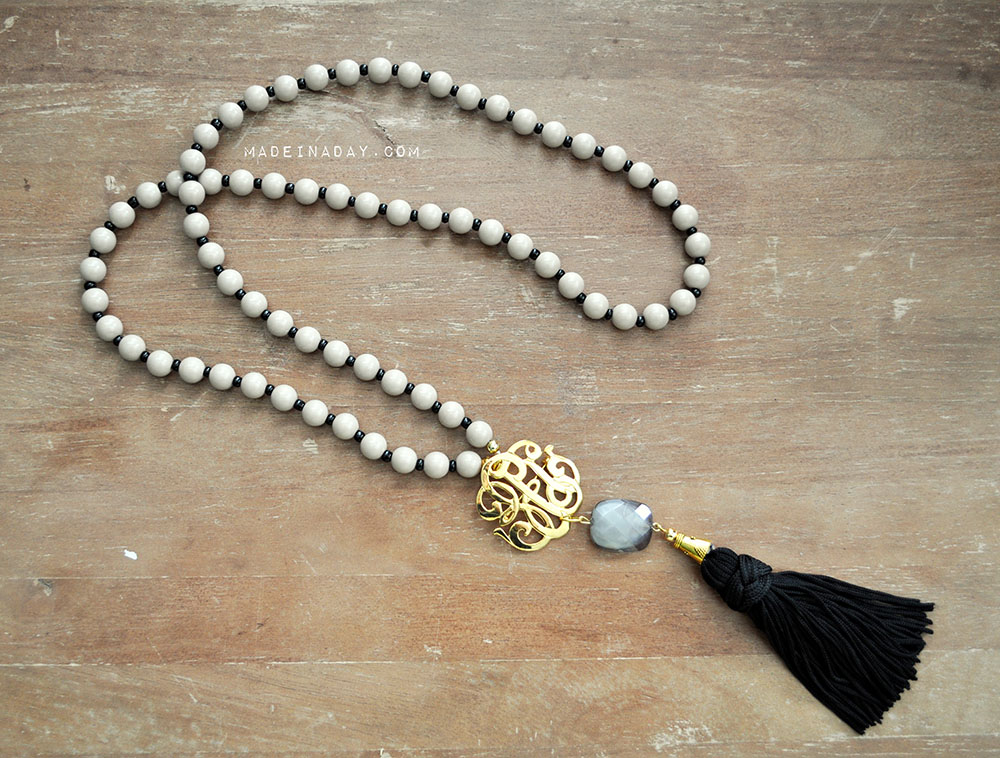
Is the black tassel have a monogram attached to it? Can you explain how you attached the monogram?
Hi Marissa,
The Monogram is a brooch pin and it has a hoop attached to the back. You can find them on Etsy. I added a jump ring to attach it to the beaded tassel. I hope this helps
Kim
How many necklaces can you make with the materials you mentioned above? Thanks!
The necklaces have at least 40-60 of the wood beads each. So buy the beads accordingly.
Kim
Do you have a tutorial for making tassels? If you have previously answered this question, I apologize, because I did not find it.
Hi Mary,
I added a link in my post to the capped tassel tutorial. It is in the second paragraph in the instructions.
Kim
Hi! I love these necklaces and your tutorial is super helpful. Where do you find your decorative beads head the tassels? I’m having a hard time finding cute ones?
Thanks,
Lauren
I found some at Hobby Lobby and Michaels. Beads are sold seasonal and by trends so they change all the time. You could also try a store in your area that sells only beads. You can buy them in singles and find unique beads that way. Glad you like my necklaces!
Kim
Hi I love these necklaces and wanted to try and recreate the one with the monogram. I was just wondering if you know where you got yours or if you could direct me to a place that sells similar ones.
Try Etsy.com for them as well. They are monogram pins but they have a loop for necklaces on back too.
Kim
These are gorgeous!!! I was just wondering how you make the black tassel with the braid around?
That tassel is one I already owned. You could try Etsy.com for the tassels if you do not want to make them yourself.
Kim
Hello,
I absolutely love the shape of the pink-tassel necklace. How were you able to get the beads to branch out into the “Y” shape from the original part of the necklace, and then how did you finish it off?
Thanks,
Elizabeth
Hi Elizabeth, For the Y shape you first cut a long piece of wire/string, add a jump ring to the center and fold the string in half. Feed your first 10 or so beads through both ends of the wire/string. Then after the ten beads split the wire/string and add the rest of the beads to each end. Tie it off with a triple knot and add a dot of glue or end with seed beads and attach ends together instead of adding a clasp, unless you want a clasp, than ad one. I hope that helps! Good luck Glad you liked my necklaces!
Kim
I so love these!!!! And my daughter will too!
Love these. So on trend and perfect for Spring. Featuring when my link party opens up tonight.
Hey Kim, Your project turned out gorgeous! Thanks for sharing it at the party! Hope to see you again soon.
These are absolutely gorgeous! We featured you at the Project Stash Link Party!
Kim, these are beautiful!! I’m featuring them today at Creative Spark. Hope you’ll link up with us again this week!
These are fantastic! So unique! Just wanted to let you know that I’m featuring them at this week’s link party!
So lovely!! Featured these at Show & Share today, thanks for linking them up last week!
These are really cute and so unique! I love that it would be so easy to create a whole collection to match just about anything.
um, i looove these! especially the gradient one and the monogram one. amazing!
b
These are so cute – I love the bright colours. I have made a few pieces of jewellery with tassels but I am never fully happy with the tassels so I’m going to head over to your tutorial on that next.
SUPER cute!! Thanks so much for sharing with my NO RULES Weekend Blog Party!
I’m off to pin these beauties :)
Love love love these!! Can you open an etsy store so I just just buy them from you! ;)
Ha! I am actually toying with that idea! It just takes so much time to make each one… I’ll let you know if I do! Thanks so much! Glad you liked them!
Kim
These tassel necklaces are amazing! I love the vibrant colors and the variety in beads! Absolutely gorgeous! Pinning right now. I’d love for you to share these at my Creative Ways Link Party. It just went live at 8pm tonight. Hope to see you there!
Blessings,
Nici
I love these tassel necklaces. I think they are beautiful and gives any outfit that little extra. I am stopping by from the Retro Re-pin Pinterest Party I pinned this and the tassel tutorial from your board. Thank you for sharing!
/Charlotte – My Green Nook
Thanks for stopping by Charlotte! Glad you liked my necklaces. Thanks for pinning!
Kim
I’ve recently became obsessed with tassels too! I’ve been looking for the perfect ones in stores and can’t find just what I’m looking for and you hit the head on the nail!
I’m glad you found my tassels! I made mini ones today for another tassel post coming up! So my obsession continues, lol. Thanks for stopping by!
Kim
Hello! I haven’t done a tassel yet and now I really want to make one! I tried to make a tassels for a party made out of raffia but it was trickier than I thought ;)
Sharing your tutorial!
Cheers,
Ursula
these are so pretty!!! thanks for sharing this tutorial!!
I love these necklaces!! The one with the monogram is perfection on a string! Beautiful :)
These are stunning! I would actually make these, thanks for the tutorial!