Easy Beaded Macrame Plant Hanger
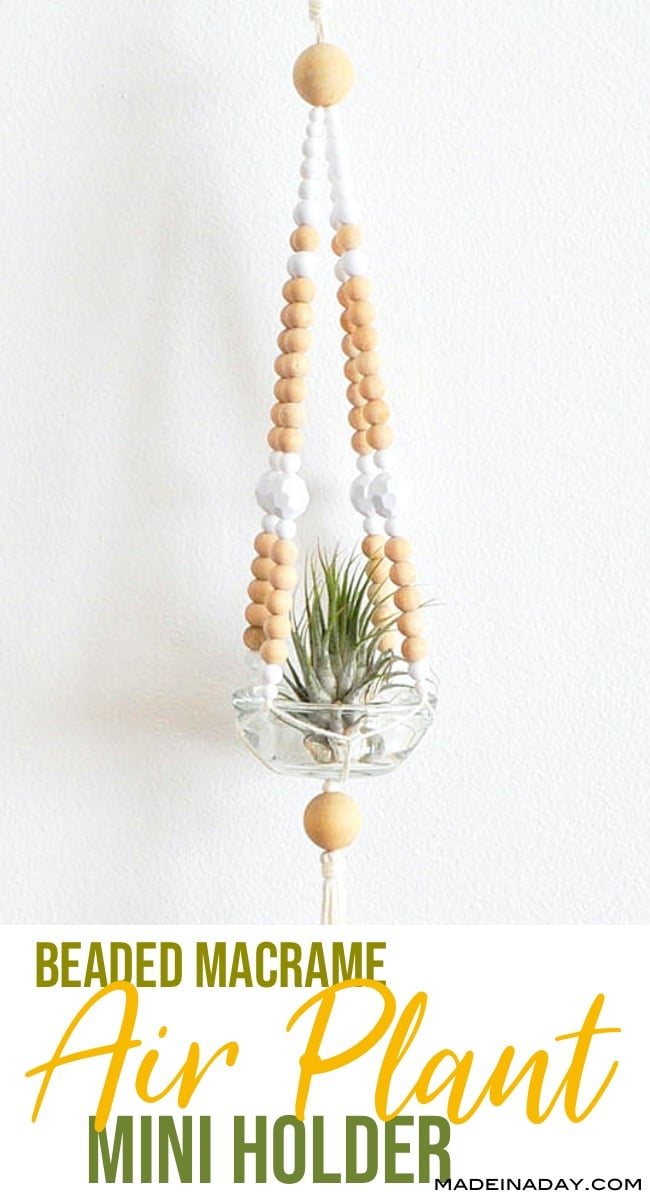
Looking for a fun way to display your air plants this spring? Try your hand at this easy beaded macrame plant hanger! This simple sweet hanger is sure to add a boho touch to your decor. For more inspiring posts like these see my Plants page.
Disclaimer: Please note that some of the links below are affiliate links and at no cost to you I will earn a commission if you purchase through those links. See my Disclosure + Privacy Policy for more info. As an Amazon Associate, I earn from qualifying purchases.
It’s a new year and I have a new obsession! It’s these cute little air plants I just can not get enough of. I think I’m so giddy about them because I have a cat and this is the one plant she can’t dig up! They do not need soil for their roots, so you can place them in indirect sun and they will thrive! I am indoor plant-less no more!
I ordered a bunch of these cool little plants from, of all places, Amazon! How crazy is that? Who knew you could get plants mailed to you and the actually live? So now that I bought a little gang of these fun plants, The new dilemma is, where am I going to put them?
Well, I have a few options and they are handmade! Today I am showing you how I made this super easy beaded macrame plant hanger. I saw one similar to this on Pottery Barn Teen and it reminded me of the wood beaded chandelier trend for dining rooms.
Even if you have not tried macrame before, (I had not tried it myself until this project), it is so simple. They are so cute you are going to want more than one! This post is a little long but once you make one it will be super easy. Let’s get started.
Easy Beaded Macrame Plant Hanger
Supplies:
- Air Plant
- Crochet Thread
- Beads: Natural Wood sizes: 20mm, 10 x 9mm , White size: 9mm, 7mm, 5mm
- 3 inch Glass Votive Holder
- Foam Ball size: 2 1/2 inch
- Scissors
Instructions:
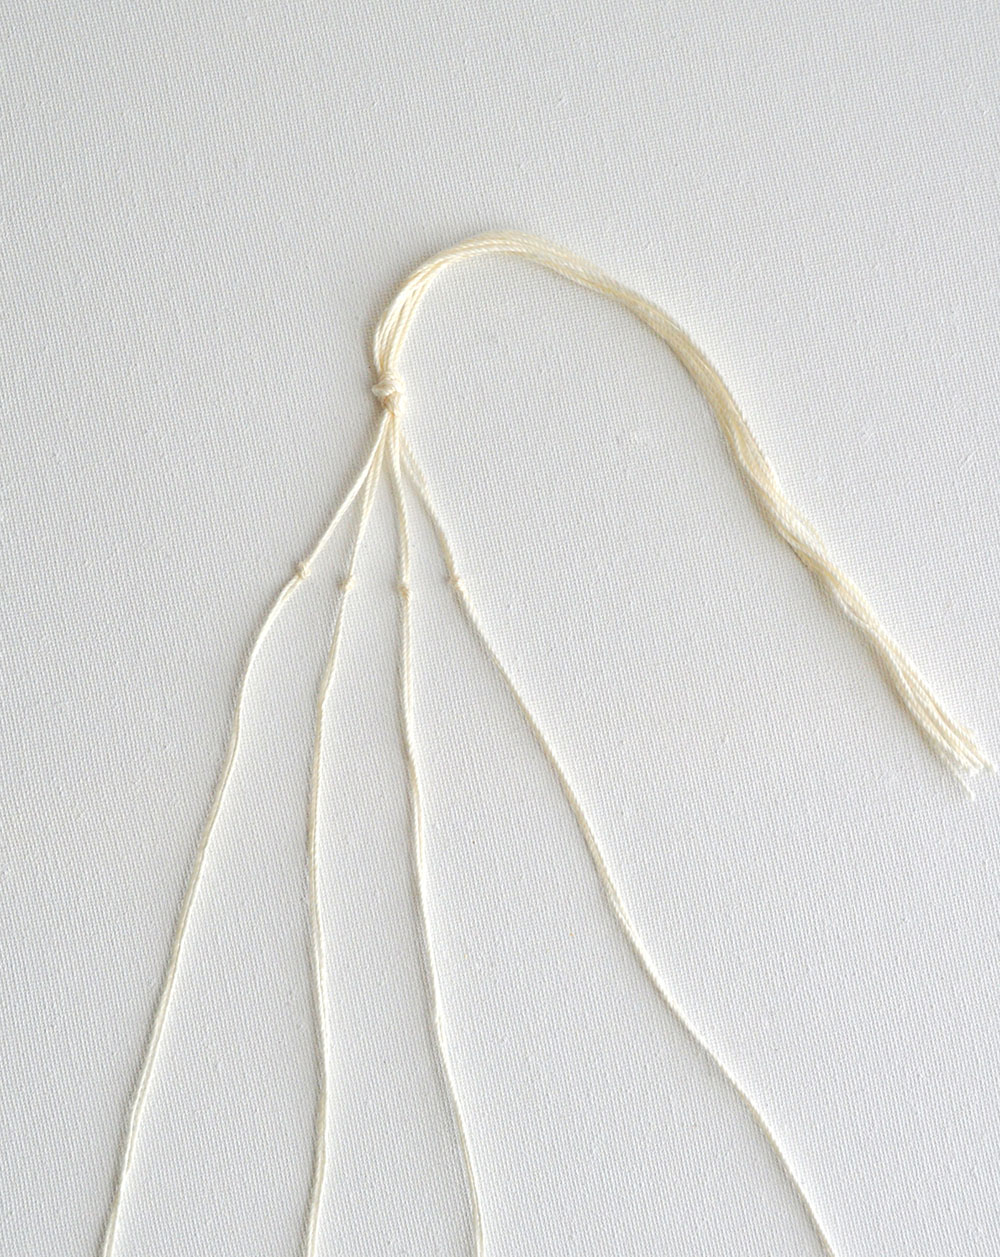
Start by cutting 8 strands of crochet string, 36 inches long. Tie them together in a knot around 9 inches from one end. Knot two strings together at 1 1/4 inch below the knot. Continue to knot two strings evenly with the first knot.
Split the string in the second knot and tie it to the string next to it, 1 inch below it. Repeat all the way around the for the other knots.
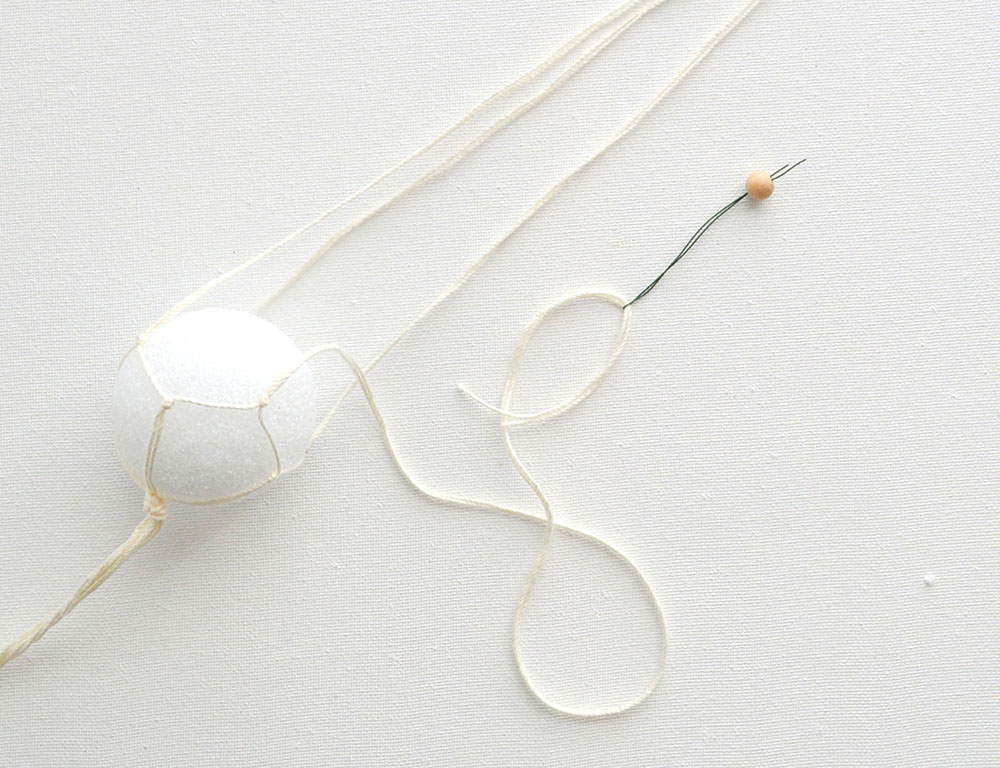
This is your basket for your votive or plant pot. I used a small foam ball to hold the string straight.
The next step is to add your beads to the ends of the strings. Take a piece of plant wire and fold it in half over the two strings. Insert the wire into the bead and pull the string through with the wire.
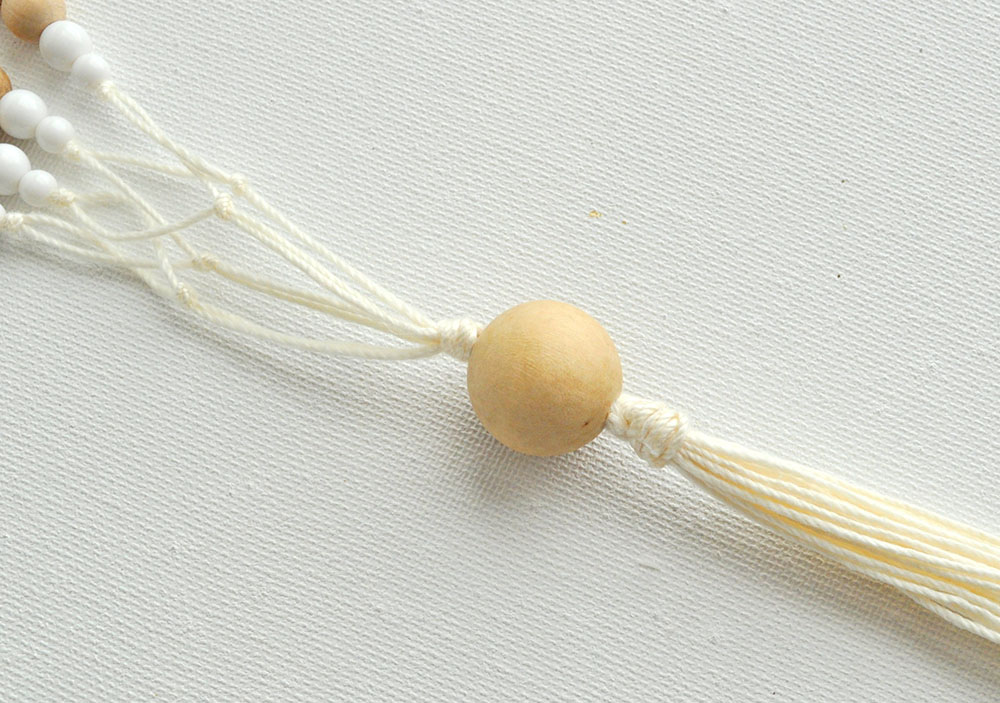
Add a Large natural bead to all strings on end. Tie off the top ends in a knot to make a loop to hang your hanger. You can stop there or add more cuteness to your hanger buy adding a large bead to the bottom string. Here’s how: First do not untie the knot on the bottom just add the bead and pull all the string through.
I added a more string to make a tassel, so the string will be fuller on the bottom. It’s easy, here’s how:
Using a 10 inch long piece of cardboard wrap crochet string around the board 10 times.
Pull the string off and cut one end.
Split the ends of the string coming out of the bottom large bead and double tie them around the center of the string from the cardboard.
Tie a string around the top of the bundle of string add a dot of glue for security. Wrap the ends of the string around the knot to make a tassel. Glue the ends and that’s it!
Add your votive or small bowl to the hanger and place your new air plant inside!
I just love how this came out and ow one of my new plants has a beautiful new home! I made some more air plant displays too! They are coming soon so stay tuned.
As seen on

Love it? Pin it!










I love this! I’ve always been intimidated by macrame but this looks like a project I could absolutely do! We just finished remodeling our bathrooms and it would be perfect to make 3 of these for one of the walls in there. I’ve heard that if you place an air plant in your bathroom, you don’t EVER have to water it because it absorbs the steam from the shower. How cool is that? I’ll let you know how that works out. :)
Hi Lisa,
I may just have to move my air plants to the bathroom. Thanks for the tip! Glad you liked my project.
Kim
I’ve been wanting to try macrame! This would be a perfect project to start with :)
You make this look so easy to create. I don’t think I’ve ever done macrame but I am in love with this planter. It may be time to give it a try!
I’ve been wanting to do an air plant project, but haven’t had a chance yet. I’ll have to order some from Amazon and see if I can recreate this :-)
This is so very sweet! Love it & pinned ;)