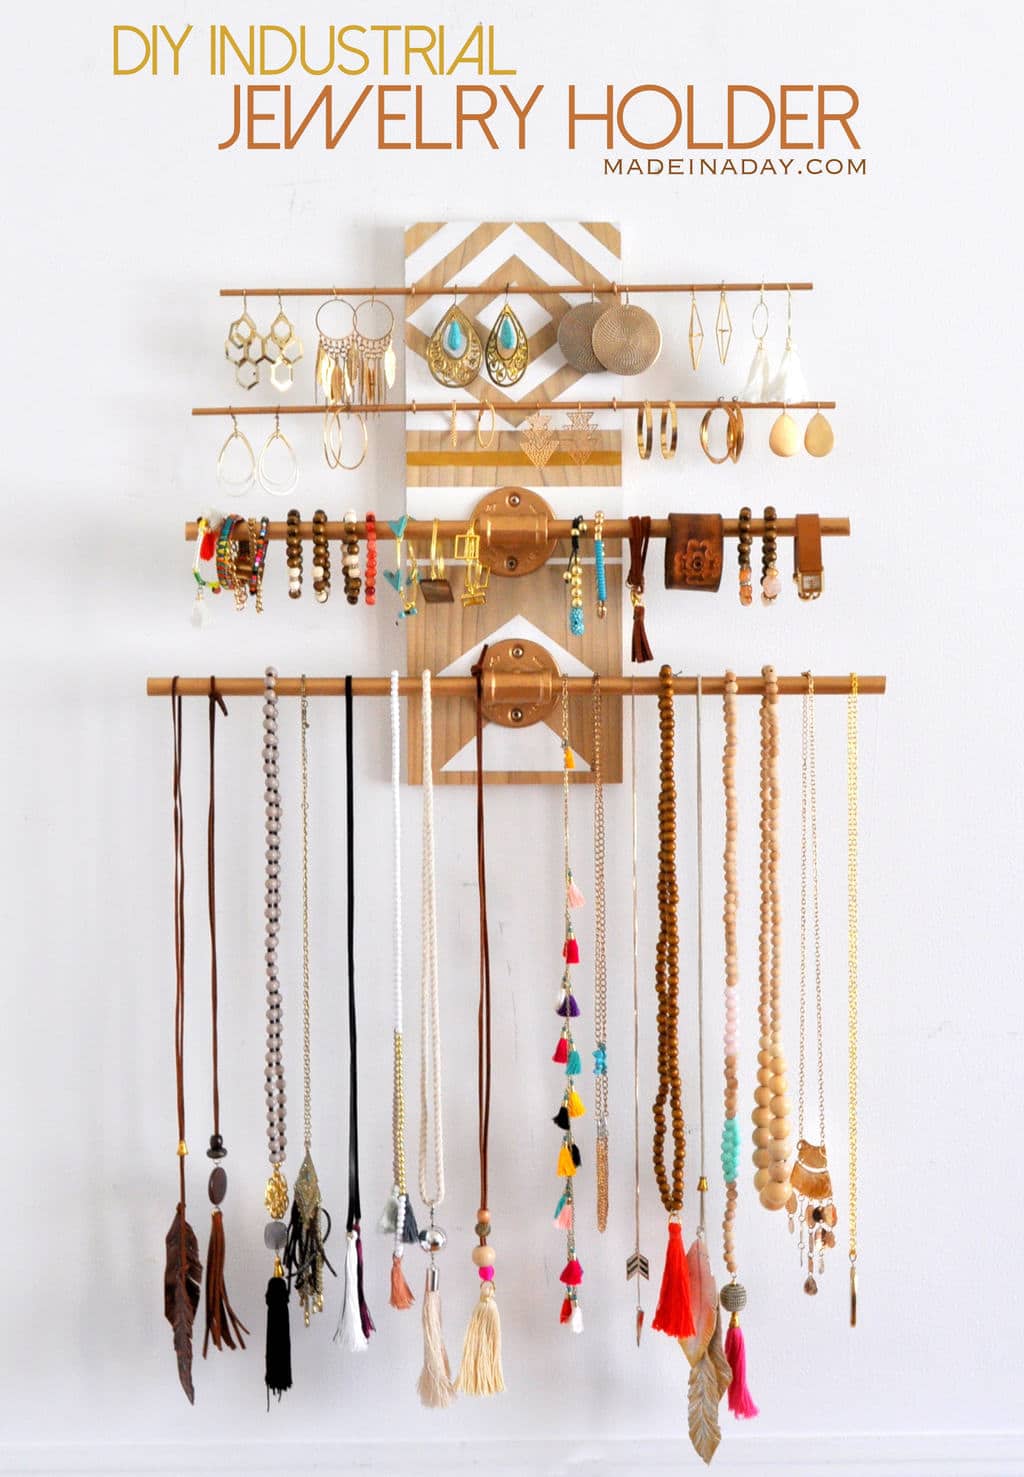
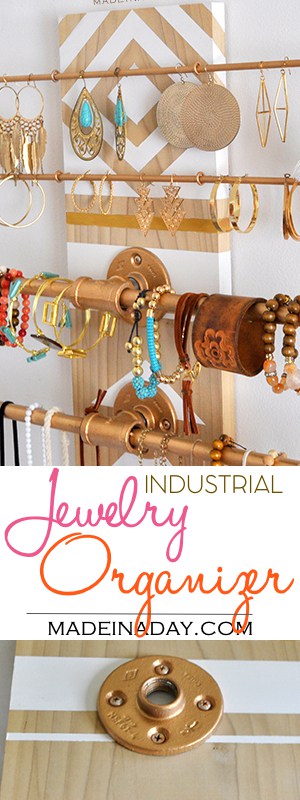
DIY Geometric Wall Jewelry Organizer

Looking for a cool way to organize your jewelry collection? Transform your space with a DIY geometric wall jewelry organizer – stylish, functional, and easy to make at home! For more fashion ideas see my Fashion + Jewelry page!
I have been whipping up a bunch of new jewelry for the summer and I realized I am running out of solutions for storage for all of it. So, I went on a Pinterest hunt for just the right wall jewelry organizer.
I decided to marry two different types of jewelry organizers by making them into one fabulous piece of wall art! I say wall art because it could be used as a hand towel rack in a bathroom or possibly a scarf or DIY earring holder in your closet, whatever you could think to do with it.
Disclaimer: Please note that some of the links below are affiliate links and at no cost to you I will earn a commission if you purchase through those links. See my Disclosure + Privacy Policy for more info. As an Amazon Associate, I earn from qualifying purchases.
⚡️NOTICE: Submitting forms for FREEBIES on this site too quickly can trigger our email spam filters. If you stop receiving your Freebie Delivery Emails, please try using a different email address, an incognito window, or you can Contact us to whitelist your email so you can receive them.
Let me tell you, I am so in love with this DIY necklace holder! I can finally see all my jewelry at once, to put together outfits. Adding the floor flanges gives it that hip industrial feel. I painted them gold so they have that bit of glam to them!
Let me show you how to make one!
How to Make a Wall Jewelry Organizer
Supplies:
- Wood Plank: Mine was 7 x 1 x 19
- Acrylic paint: White, gold, copper
- Blue painter’s tape
- 2 Plumbing Floor Flanges 2.7 x 1/2 nipple (Lowe’s)
- 2 Galvanized T’s: Size 1/2 inch
- 2 Galvanized Steel Pipe Nipples: Size 1/2 inch x Close
- 4 Screw Eye Hooks, size 1 1/8 in, gold if possible, (Lowe’s)
- 8 Wood Screws that fit the Flanges
- 2 Wood Dowels: Size 1/2 x 36 in. (Lowe’s) or size down to 3/8 if the 1/2 inch dowels do not fit the flanges. You may need to add a small shim to make them tight. See the tip below in the tutorial.
- 1 Wood Dowel, in the smallest size or size that will fit through the eye of the hooks (Lowe’s)
- Metallic Gold spray paint
- Hack saw
- Z-clip Wall Hanger
- Paintbrushes
- Sandpaper
Instructions:
The piece of wood I used was a scrap piece I had from another project. You can get pieces of cut wood at your local hardware store. Adjust the size of the wood and add more flanges if you like.
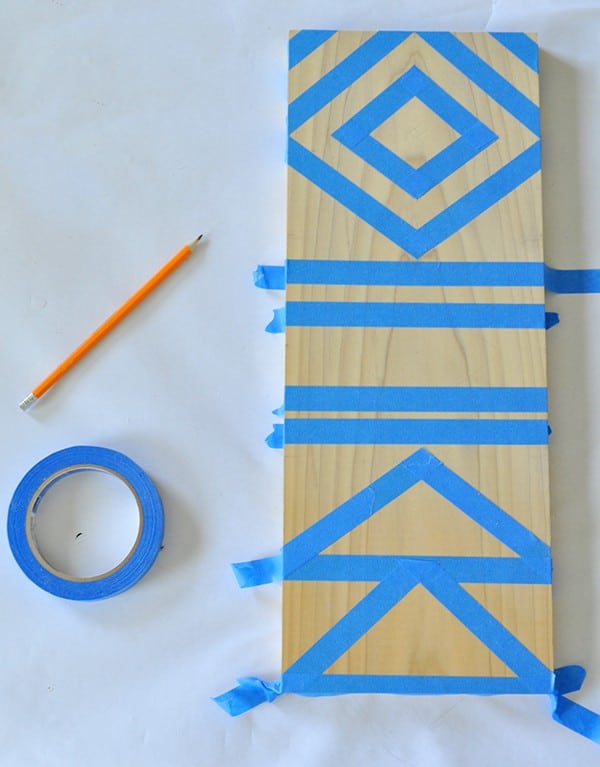
Lightly sand all the edges of your board. Using a ruler, measure out your pattern and lightly draw it on the board with a pencil. Place your painters tape for your shapes.

Paint the shapes with acrylic paint.
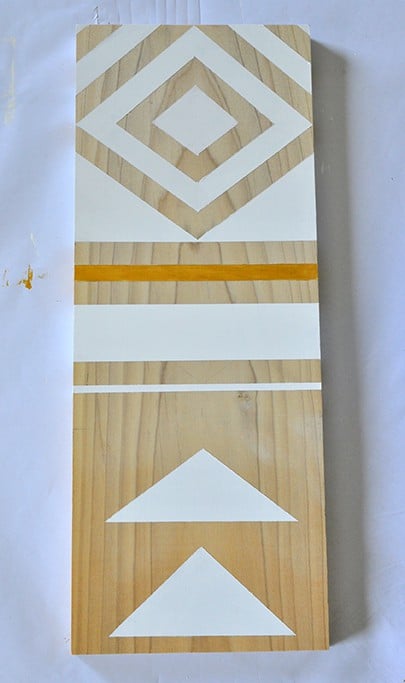
TIP: I painted the stripe where the gold strip is white first so the gold would show up brighter on the wood.
Let the paint dry and remove the tape. Gently wipe away the pencil marks with a wet cloth.
Cut down the dowels to different sizes with a hacksaw. My dimensions starting from the top are: #1 is 19 1/2 inches, #2 is 21 1/2 inches, #3 is 22 inches and #4 is 24 inches.
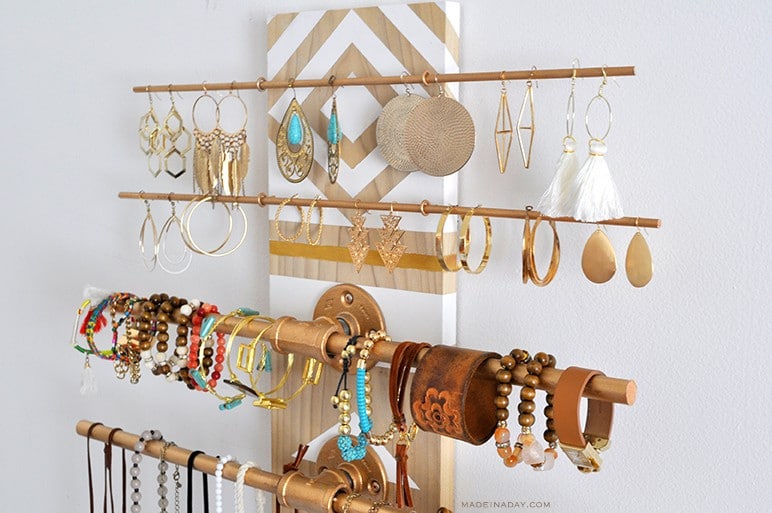
Spray paint both of the flanges, galvanized T’s, all four eye hooks (if needed), and all three dowels with the metallic gold paint. Let it dry.

Place a floor flange in the bottom center of your board and secure with screws. Add the next flange above the bottom one and secure with wood screws.
Screw in the nipples on the flanges, then screw on the galvanized T’s and tighten. Touch up screws with the acrylic copper paint, (it matches the metallic gold spray paint I chose perfectly).

TIP: When I added the larger dowels into the galvanized T’s, the dowels would not fit snugly, they would turn and were a bit loose in the T’s. I hammered a small piece of the small wooden dowel to break it up and then I inserted it into the T’s like a wedge to tighten the dowels so they will not turn. They worked perfectly!

Add your Z-clip picture hanger to the back of the wood. Mount it to the wall, then add the eye hooks and insert the small dowels. Hang your jewelry and that’s it!
It came out so cool I love it! I am so pleased with how this project turned out! It looks fabulous in my closet.
NOTE: I used the Z-clip since this can get very heavy depending on the jewelry. My set holds up to 75lbs. The flanges and T’s are pretty heavy and you need to secure the jewelry holder snug to the wall for the added weight.


Love it? Pin it!
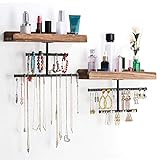
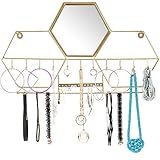
Don’t feel like making a Jewelry Organizer? Grab one of my favs here!


The geometric industrial design looks stunning! Such a modern way to keep jewelry organized.
I realize this is an older blog post, but it’s been updates semi-recently, so I’m going to comment anyway. :) Confused how a 5/8″ diameter dowel is fitting into a 1/2″ pipe fitting? You even mention having extra room and having to shim them up in the fitting to make them tight, but my brain says the math doesn’t work. They shouldn’t even fit to begin with. I could see 3/8″ being like that, maybe even a 1/2″ dowel for some reason, but the 5/8″ confuses me.
Hi Synthandrus,
I agree, I think I wrote down the wrong size. I am pretty sure it was 3/8. At the time, I went with what was available at Lowes. They must not have had the 1/2inch dowels in stock or they were too big to go into the flanges so I sized down and added the shims to make it fit.
I used your link above to buy the flanges from amazon, in part because lowe’s would have to ship them in and it would take longer. I was saddened by the price, but more disappointed when they arrived and I realized the information was wrong. You have 1.5″ flanges linked (which are HUGE) – I think you wanted .5″ flanges. That must have been why they were so expensive. Not sure what to do with these now.
Hi Lyssa,
Sorry to hear about your issues with the floor flanges. Mine are 2.7 x 2.7 x 2.7 inch around as the one on Amazon states it is. I did not see the 1.5 nip size when I linked it up. Last year when I posted this post there were very few flanges available on Amazon, I guess I thought this was the correct one. I am really sorry about you having to return these items. I do know all you have to do is send the item back is to print out a return slip and put it back in the mail. Amazon will refund you immediately as the item is scanned by the postal service. I am removing my links for these items from this post. Ordering them online is obviously not a good idea, getting them from a hardware store is a better way to go to make sure you have the right fit in this case. This is why I added that they are found at Lowe’s to the supply list.
Kim
Oh that’s alright, it’s an honest mistake. I did find the links helpful to get an idea for pricing and to see a visual of what I would look for in the store. I should have realized when 1.5″ didn’t match the half inch for the other pieces, but I’m new to hardware and DIY. I only posted so that someone else wouldn’t make the same mistake I did. Thank you for sharing this- love the look!
Love Love Love this project! The industrial pipes are so unique – this is officially going on my DIY to do list! Thanks for sharing it at the Totally Terrific Tuesday link party, I’m featuring it this week on the blog =)
Thanks so much Kaitlin for featuring me! I’ll stop by and check it out.
Your fabulous Geometric Wall Jewelry Organizer caught my eye at the Creative Circle Party – love it! Pinning to share :)
Oh so glad you liked it Marie. Thanks for stopping and for pining!
Kim